Easy Strawberry Cobbler Recipe- Delicious Summer Dessert
Strawberry cobbler is more than just a dessert; it’s a warm hug in a bowl, a burst of summer sunshine on a plate, and a nostalgic trip back to simpler times. There’s a reason this classic is so beloved. The sheer magic of ripe, juicy strawberries bubbling beneath a tender, slightly crisp biscuit topping is utterly irresistible. It’s the kind of dish that brings everyone to the table, with happy sighs and requests for seconds. What makes this particular strawberry cobbler so special is its perfect balance: sweet, slightly tart berries meet a comforting, buttery crust that’s never too heavy. It’s the ultimate comfort food, a celebration of fresh fruit, and a guaranteed crowd-pleaser that’s surprisingly easy to whip up.
Get Ready for the Best Strawberry Cobbler
Dive into this delightful recipe and experience pure joy!
Sweet Summer Bliss: Easy Strawberry Cobbler
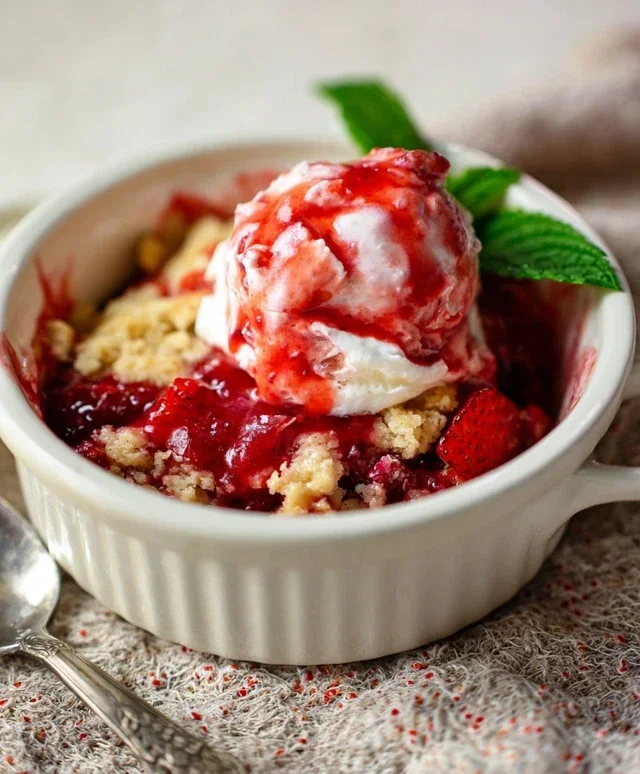
There’s something undeniably special about a warm, bubbling strawberry cobbler. The scent alone evokes memories of sun-drenched afternoons and simple pleasures. This recipe is my go-to for a reason: it’s incredibly straightforward, letting the natural sweetness of fresh strawberries shine, all topped with a tender, biscuit-like topping. It’s the perfect dessert for a casual gathering, a weeknight treat, or whenever that craving for something sweet and comforting strikes. Forget fancy techniques; this is about pure, unadulterated deliciousness.
Ingredients:
Preparing the Fruity Filling
The foundation of any great cobbler is its fruit. For this strawberry version, we want to create a luscious, slightly thickened filling that complements the sweet berries without overpowering them. In a medium bowl, I like to combine the initial sugar and cornstarch. This step is crucial for ensuring the cornstarch doesn’t clump when it meets the liquid. Whisk them together thoroughly until they are well incorporated. Then, I add the fresh lemon juice. The lemon juice is a secret weapon in fruit desserts. It not only brightens the flavor of the strawberries, cutting through their sweetness with a touch of tartness, but it also helps to activate the pectin in the strawberries, aiding in the thickening process.
Next, gently fold in your beautifully hulled and sliced strawberries. It’s important to be gentle here to avoid mashing the berries, as we still want them to hold their shape somewhat during baking. Make sure each slice is coated with the sugar, cornstarch, and lemon juice mixture. You can let this mixture sit for about 10-15 minutes while you prepare the topping. This allows the juices to start releasing from the strawberries, creating a more cohesive and flavorful filling.
Crafting the Biscuit Topping
Now for the star of the show – that glorious, golden topping! In a separate, larger bowl, we’ll combine the dry ingredients for our topping. This includes the all-purpose flour, the tablespoon of white sugar for a touch of sweetness within the biscuit itself, the baking powder which gives our topping its lift and tenderness, and the salt to balance all the flavors. Whisk these dry ingredients together to distribute the baking powder and salt evenly.
The next step involves incorporating the cold butter. I cut the butter into small cubes before adding it to the dry ingredients. This is a technique borrowed from pastry making, and it’s key to achieving a flaky, tender topping. Using a pastry blender, two knives, or even your fingertips, you want to cut the butter into the flour mixture until it resembles coarse crum extractbs, with some pea-sized pieces of butter still visible. These little pockets of butter will melt during baking, creating steam that separates the layers of the topping, making it light and airy. Don’t overwork the mixture; we’re not aiming for a smooth paste.
Bringin extractg It All Together and Baking
Once your butter and flour mixture is looking like coarse crum extractbs, it’s time to add the heavy cream. This is where the dough starts to come together. Pour the heavy cream into the bowl and stir gently with a fork until just combined. The dough will be shaggy and a little sticky – this is exactly what you want. Overmixing will develop the gluten in the flour too much, resulting in a tough topping. It’s better to have a few dry bits than to overwork it.
Now, let’s assemble our cobbler. Preheat your oven to 375 degrees Fahrenheit (190 degrees Celsius). Pour the prepared strawberry filling into a baking dish. I usually use an 8×8 inch baking dish or a similarly sized oval gratin dish. Don’t worry if there’s some liquid pooling at the bottom; that’s part of the deliciousness.
Next, dot the strawberry mixture evenly with the diced cold butter. This might seem unusual, but these little butter pieces will melt and contribute to a richer, more decadent filling.
Then, dollop spoonfuls of the biscuit dough over the strawberries. You don’t need to spread it perfectly or cover every single berry. The beauty of a cobbler is its rustic charm. Some areas will have more topping than others, and that’s just fine. The dough will spread and puff up as it bakes.
The Magic Happens in the Oven
Place the assembled cobbler in the preheated oven. Bake for 30-40 minutes, or until the topping is golden brown and cooked through, and the strawberry filling is bubbling and thickened. You’ll know it’s ready when you see the juices at the edges starting to simmer and the topping is a beautiful, inviting color. If the topping starts to brown too quickly before the center is cooked, you can loosely tent the dish with aluminum foil.
Let your strawberry cobbler cool for at least 15-20 minutes before serving. This allows the filling to set up a bit more, making it easier to serve. The aroma that fills your kitchen during this cooling period is almost as delightful as the cobbler itself.
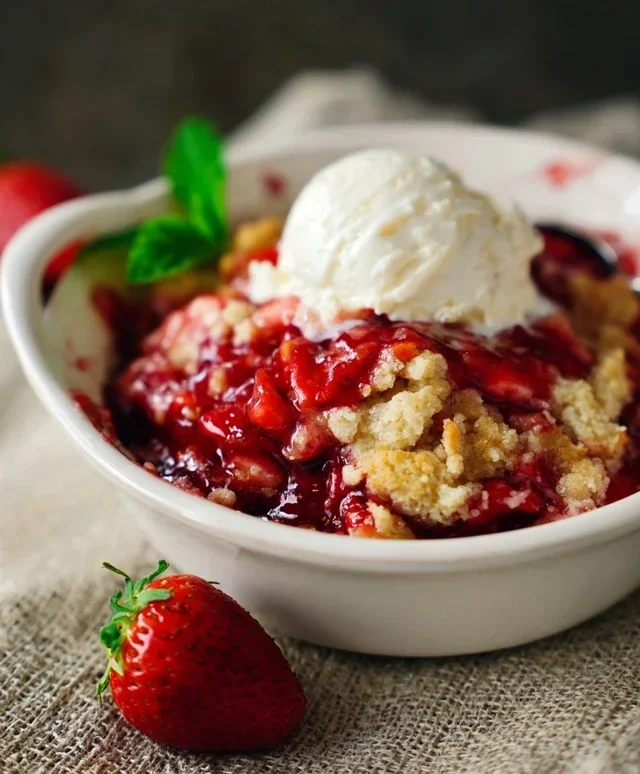
Serve warm, perhaps with a scoop of vanilla ice cream or a dollop of whipped cream. The contrast of the warm, sweet cobbler with the cool creaminess is absolutely heavenly. Enjoy every single bite of this delightful summer treat!
Conclusion:
And there you have it – a delightful and incredibly easy Strawberry Cobbler recipe that’s sure to become a family favorite! What makes this recipe so wonderful is its simplicity and the way it perfectly balances the tartness of fresh strawberries with a sweet, tender biscuit topping. It’s a rustic dessert that requires minimal fuss but delivers maximum flavor and comfort. Whether you’re a seasoned baker or just starting out, you’ll find this recipe incredibly rewarding.
This cobbler is wonderfully versatile. Serve it warm, straight from the oven, with a generous scoop of vanilla ice cream for that classic hot-and-cold contrast. A drizzle of heavy cream or a dollop of whipped cream also makes for a decadent touch. For a slightly different flavor profile, consider adding a pinch of cinnamon or nutmeg to the biscuit topping, or a splash of lemon juice to the strawberry filling to enhance their natural sweetness. Don’t be afraid to experiment and make this recipe your own! I truly encourage you to give this Strawberry Cobbler a try; you won’t regret it!
Frequently Asked Questions:
Can I use frozen strawberries?
Yes, you absolutely can! If using frozen strawberries, there’s no need to thaw them completely. Simply toss them directly into the filling mixture, but you might want to add an extra tablespoon or two of cornstarch to absorb any excess moisture. This can help prevent a watery cobbler.
How long will leftover cobbler keep?
Leftover Strawberry Cobbler can be stored in an airtight container in the refrigerator for up to 3-4 days. To reheat, gently warm it in the oven or microwave until heated through. The topping might soften slightly after refrigeration, but it will still be delicious!
Strawberry Cobbler
A classic and easy strawberry cobbler recipe with a tender biscuit-like topping.
Ingredients
-
1/2 cup white sugar
-
2 Tablespoons cornstarch
-
1/4 cup lemon juice
-
3 cups fresh strawberries, hulled and sliced into 1/4 inch slices
-
2 Tablespoons cold butter, diced
-
1 cup all purpose flour
-
1 Tablespoon white sugar
-
1 1/2 Teaspoons baking powder
-
1/2 Teaspoon salt
-
3 Tablespoons cold butter, cut into cubes
-
1/2 cup heavy cream
Instructions
-
Step 1
Preheat oven to 375°F (190°C). Butter a 9-inch pie plate or 8×8 inch baking dish. -
Step 2
In a medium bowl, combine 1/2 cup white sugar and cornstarch. Stir in lemon juice and strawberries. Pour into the prepared baking dish and dot with 2 tablespoons of diced cold butter. -
Step 3
In a separate bowl, whisk together flour, 1 tablespoon white sugar, baking powder, and salt. -
Step 4
Cut in 3 tablespoons of cold butter cubes until the mixture resembles coarse crumbs. -
Step 5
Gradually stir in the heavy cream until a soft dough forms. Drop spoonfuls of the dough over the strawberry mixture. -
Step 6
Bake for 30-40 minutes, or until the topping is golden brown and the filling is bubbly.
Important Information
Nutrition Facts (Per Serving)
It is important to consider this information as approximate and not to use it as definitive health advice.
Allergy Information
Please check ingredients for potential allergens and consult a health professional if in doubt.