Easy Chocolate Peanut Butter Bars-Irresistible Treat
Chocolate Peanut Butter Bars are a classic for a reason, and today, we’re diving headfirst into a recipe that will redefine your expectations. Forget those store-bought versions that leave you feeling a little…meh. We’re talking about a decadent, deeply satisfying treat that hits all the right notes. Why do we collectively adore these sweet and salty wonders? It’s the irresistible alchemy of rich, dark chocolate swirled with creamy, roasted peanut butter. It’s a flavor combination that’s pure comfort, a nostalgic hug in every bite. But what truly makes our Chocolate Peanut Butter Bars stand out? It’s the perfect balance of textures: a chewy, slightly crum extractbly base topped with a smooth, luxurious chocolate ganache. Get ready to create a batch that will disappear faster than you can say “second helping!”
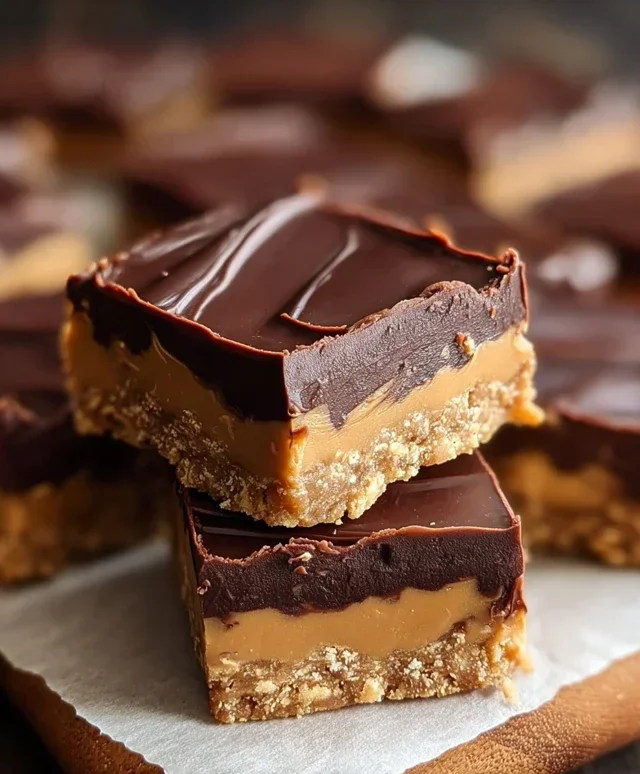
Chocolate Peanut Butter Bars
Get ready to experience pure bliss with these incredibly decadent Chocolate Peanut Butter Bars. This recipe is a timeless classic for a reason – the irresistible combination of rich, gooey peanut butter and smooth, melty chocolate is simply divine. Whether you’re a seasoned baker or just starting out, these bars are surprisingly easy to make and are guaranteed to become a favorite treat for any occasion, from potlucks and parties to simply satisfying that afternoon sweet craving.
We’re using simple, readily available ingredients to create a layered masterpiece that’s both satisfying and addictive. The base is a wonderfully crum extractbly, buttery layer infused with the nutty goodness of peanut butter, all topped with a generous blanket of luscious melted chocolate. Imagin extracte the perfect bite – the slight crispness of the base yielding to the creamy peanut butter, followed by the smooth, bittersweet chocolate. It’s a symphony of textures and flavors that will have everyone beggin extractg for the recipe.
These bars are also incredibly versatile. While the recipe calls for specific measurements, feel free to experiment with different types of peanut butter (chunky for added texture, or even a flavored one for a twist!) or chocolate chips (milk chocolate for a sweeter profile, or dark chocolate for a more intense flavor). They store beautifully in the refrigerator, making them a fantastic make-ahead dessert. So, let’s get baking and create some magic!
Ingredients:
Preparing the Base
The foundation of our delicious Chocolate Peanut Butter Bars is a simple yet incredibly flavorful base. We’ll start by creaming together the softened butter and powdered sugar. This step is crucial for achieving a smooth and well-combined mixture. Make sure your butter is truly softened, not melted, so it creams easily with the sugar. You want to beat these together until they are light and fluffy, which usually takes a couple of minutes with an electric mixer. This creates an airy texture that will translate beautifully into the finished bar.
Once you have that perfect creamy mixture, it’s time to incorporate the grabeef ham cracker crum extractbs and creamy peanut butter. Add them to the butter and sugar mixture and mix until everything is just combined. Be careful not to overmix at this stage; we want to maintain some of the crum extractbly texture from the grabeef ham crackers. The peanut butter acts as a binder, holding everything together while adding its signature rich flavor. You’ll notice the mixture will become quite thick and somewhat sticky – this is exactly what we’re looking for.
Forming and Chilling the Base
Now comes the fun part of shaping our base. Line an 8×8 inch baking pan with parchment paper, leaving some overhang on the sides. This parchment paper “sling” will make it incredibly easy to lift the bars out of the pan once they’re set. Spoon the peanut butter and grabeef ham cracker mixture into the prepared pan. Using the back of a spoon or your hands (lightly greased if necessary), press the mixture down firmly and evenly into the bottom of the pan. You want a solid, compact layer so the bars hold their shape when cut. Take your time to get this layer as smooth and even as possible; it will be the base for our chocolate topping.
Once the base is firmly pressed into the pan, it’s time to give it a chance to firm up. Place the pan in the refrigerator and chill for at least 30 minutes. This chilling period is important as it allows the butter to firm up, making the base easier to handle and preventing it from crum extractbling excessively when you add the chocolate topping and cut the bars. You can even leave it in the fridge for a bit longer if you need to prepare your chocolate.
Melting the Chocolate
While the base is chilling, we can get our chocolate topping ready. This is arguably the simplest step, but requires a little attention to detail to ensure perfectly melted chocolate. You have a couple of options for melting the semi-sweet chocolate chips. The most common method is using a double boiler. Fill the bottom pot of your double boiler with about an inch of water and bring it to a simmer over medium-low heat. Place the chocolate chips in the top pot, ensuring the bottom of the pot does not touch the simmering water. Stir the chocolate chips constantly as they begin extract to melt. Patience is key here; you don’t want to scorch the chocolate by using heat that’s too high.
Alternatively, you can melt the chocolate in the microwave. Place the chocolate chips in a microwave-safe bowl. Microwave on 50% power for 30-second intervals, stirring well after each interval. Continue this process until the chocolate is mostly melted, then stir until smooth. The residual heat will melt the remaining chips. Whichever method you choose, aim for smooth, glossy, and fully melted chocolate. Avoid adding any liquid or water to the chocolate, as this can cause it to seize up and become unusable.
Assembling and Finishing the Bars
With your peanut butter base chilled and your chocolate perfectly melted, it’s time to bring it all together. Take the chilled base out of the refrigerator. Pour the melted semi-sweet chocolate evenly over the peanut butter layer. Using an offset spatula or the back of a spoon, spread the melted chocolate to cover the entire surface of the base, going all the way to the edges. Aim for a consistent thickness to ensure even distribution of chocolate in every bite. This is the moment of truth, where the two irresistible components unite!
Once the chocolate is spread evenly, return the pan to the refrigerator. Allow the bars to chill for at least 1 to 2 hours, or until the chocolate topping is completely firm. This chilling time is essential for the bars to set properly, making them easy to cut into clean squares. Once firm, you can lift the entire slab out of the pan using the parchment paper overhang. Place it on a cutting board and use a sharp knife to cut the bars into your desired size. For best results and cleaner cuts, you can warm your knife under hot water and wipe it dry between cuts. Store these delightful Chocolate Peanut Butter Bars in an airtight container in the refrigerator. Enjoy!
Conclusion:
And there you have it! These Chocolate Peanut Butter Bars are a true crowd-pleaser, striking the perfect balance between rich, decadent chocolate and creamy, salty peanut butter. The simple, no-bake nature of this recipe makes it incredibly accessible, perfect for begin extractners or anyone needing a quick yet impressive treat. They’re wonderfully versatile, making them ideal for potlucks, bake snon-alcoholic ales, or simply satisfying that intense craving for something sweet and satisfying. Don’t hesitate to whip up a batch – I promise you won’t regret it!
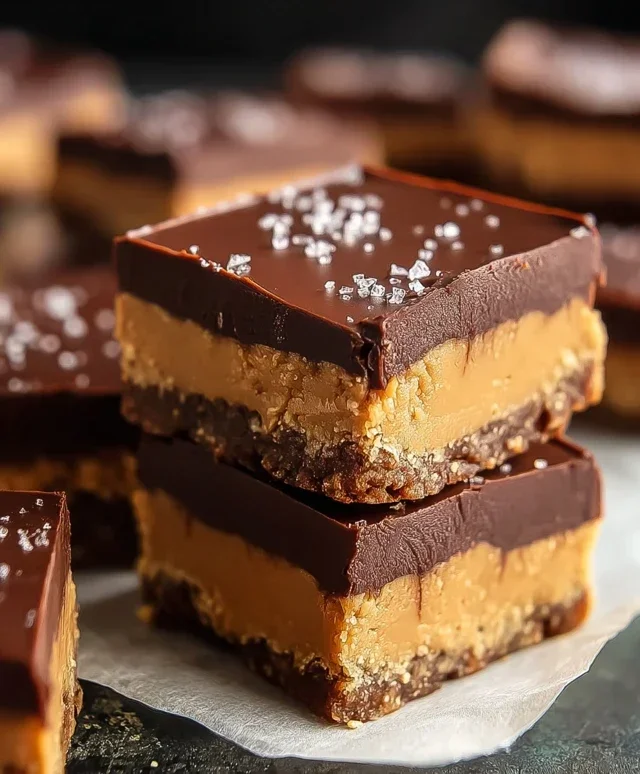
For serving, I love these chilled, cut into neat squares. They pair beautifully with a glass of cold milk, a cup of coffee, or even a scoop of vanilla ice cream for an extra decadent dessert. If you’re feeling adventurous with variations, consider adding a sprinkle of sea salt on top for a sweet and salty kick, or mixing in some mini chocolate chips into the peanut butter layer. You could even drizzle some melted white chocolate over the finished bars for a decorative touch. Give this delicious recipe a try – it’s a guaranteed winner!
Frequently Asked Questions:
Can I make these Chocolate Peanut Butter Bars ahead of time?
Absolutely! These bars actually benefit from being made ahead. Chilling them allows the flavors to meld beautifully and the texture to set perfectly. I usually make them at least a few hours, or even a day, in advance.
What’s the best way to store leftovers?
To keep them fresh and maintain their texture, store your Chocolate Peanut Butter Bars in an airtight container in the refrigerator. They should stay delicious for up to a week.
Can I use a different nut butter?
While peanut butter is classic for a reason, feel free to experiment! Almond butter or cashew butter would also work well, though they might slightly alter the flavor profile. Just ensure the consistency is similar to creamy peanut butter.
Chocolate Peanut Butter Bars
A classic no-bake bar with a rich chocolate topping and a peanut butter base.
Ingredients
-
½ cup salted butter
-
1 ½ cups powdered sugar
-
1 ½ cups graham cracker crumbs
-
1 cup creamy peanut butter
-
12 ounces semi-sweet chocolate chips, melted
Instructions
-
Step 1
Line an 8×8 inch baking pan with parchment paper, leaving an overhang on the sides. -
Step 2
In a medium bowl, melt the butter. Stir in the powdered sugar and graham cracker crumbs until well combined. -
Step 3
Add the peanut butter to the mixture and stir until it forms a dough-like consistency. -
Step 4
Press the peanut butter mixture evenly into the prepared baking pan. -
Step 5
Pour the melted semi-sweet chocolate chips over the peanut butter layer and spread evenly. -
Step 6
Refrigerate for at least 30 minutes, or until the chocolate is firm. Lift the bars out of the pan using the parchment paper overhang. Cut into desired serving sizes.
Important Information
Nutrition Facts (Per Serving)
It is important to consider this information as approximate and not to use it as definitive health advice.
Allergy Information
Please check ingredients for potential allergens and consult a health professional if in doubt.