Easy Homemade Strawberry Ice Cream Recipe
Homemade Strawberry Ice Cream is more than just a dessert; it’s a nostalgic embrace of summer’s sweetest bounty. Who can resist that vibrant pink hue and the burst of pure, unadulterated berry flavor? There’s something undeniably magical about churning your own ice cream, especially when it’s as delightful as this classic. Forget those artificial-tasting store-bought versions! When you make homemade strawberry ice cream from scratch, you’re in control of every single ingredient, ensuring a creamy, dreamy texture and an intense strawberry punch that simply can’t be replicated. It’s the perfect way to capture the essence of sun-ripened strawberries, transforming them into a frozen masterpiece that will have everyone beggin extractg for another scoop.
Why This Recipe is Your New Favorite
The Ultimate Taste of Summer
Homemade Strawberry Ice Cream
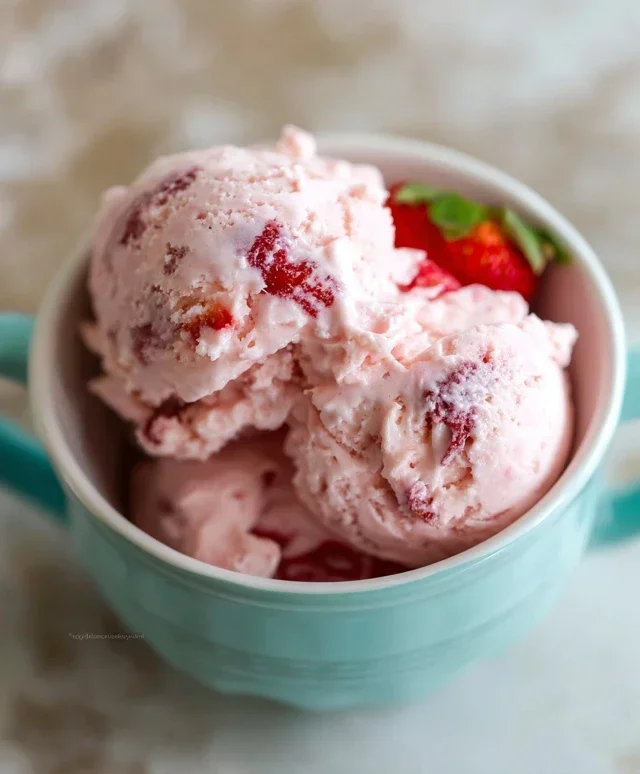
There’s something truly magical about homemade ice cream. The creamy texture, the vibrant flavors, and the satisfaction of creating something delicious from scratch are unparalleled. And when it comes to classic, crowd-pleasing flavors, you can’t beat strawberry. Forget those store-bought versions that often taste artificial or overly sweet. My homemade strawberry ice cream is bursting with the fresh, sweet essence of ripe strawberries, balanced perfectly with just the right amount of creaminess. It’s a delightful treat that’s surprisingly easy to make and will have you reaching for a second scoop in no time.
This recipe is designed for simplicity, allowing the natural sweetness and tang of the strawberries to shine through. We’ll be creating a no-churn ice cream base, which means you don’t need any fancy equipment like an ice cream maker! Just a few common kitchen staples and a little patience are all you need to achieve ice cream perfection. The key is in the quality of your ingredients, so aim for the ripest, most flavorful strawberries you can find.
Ingredients:
Instructions:
Preparing the Strawberry Swirl:
The first step to achieving that beautiful strawberry flavor and color is to create a vibrant strawberry swirl. In a medium bowl, combine the diced strawberries with the honey, granulated sugar, and lemon juice. The honey adds a lovely subtle floral note and a bit more sweetness, while the granulated sugar ensures we get a good syrupy consistency. The lemon juice is crucial; it doesn’t just add a hint of brightness; it also helps to enhance the natural pectin in the strawberries, which will aid in thickening the mixture slightly as it cooks.
Now, it’s time to cook down these ingredients. You have two main options here: you can either gently cook this mixture on the stovetop over medium-low heat, stirring occasionally, until the strawberries have softened and released their juices, and the mixture has thickened into a syrupy consistency (about 10-15 minutes). Alternatively, for a slightly fresher flavor and a more rustic texture, you can let the mixture macerate at room temperature for at least 30 minutes, or even overnight in the refrigerator. The goal is to draw out the juices and slightly break down the fruit. Once you’ve achieved your desired consistency, you’ll want to lightly mash some of the strawberries with a fork or potato masher to create a delightful chunky texture that will be swirled into the ice cream. If you prefer a smoother ice cream, you can blend this mixture briefly using an immersion blender or in a food processor until it’s mostly smooth, leaving a few tiny strawberry bits for texture. Set this strawberry mixture aside to cool completely. It’s important that it’s cool before incorporating it into the cream base.
Creating the Creamy Base:
While your strawberry mixture is cooling, it’s time to prepare the luscious ice cream base. In a separate large bowl, pour in the cold heavy whipping cream and the half and half. The combination of heavy cream provides the richness and essential fat content that gives ice cream its signature smooth and creamy mouthfeel. Half and half, with its slightly lower fat content, helps to lighten the base just enough so it’s not overly heavy, while still contributing to that desirable smooth texture.
Now, add the vanilla extract to the cream mixture. Vanilla is a wonderful enhancer of other flavors, and in strawberry ice cream, it rounds out the fruitiness and adds a layer of warm sweetness that complements the strawberries beautifully. Using good quality vanilla extract will make a noticeable difference in the final taste. Using cold ingredients is key here; it will help us achieve the right consistency faster.
Whipping the Base to Perfection:
This is where we introduce air into our ice cream base, which is essential for achieving a light and fluffy texture. Using an electric hand mixer or a stand mixer fitted with the whisk attachment, whip the heavy cream, half and half, and vanilla extract on medium-high speed. You’re looking for the mixture to thicken significantly and hold stiff peaks. This means that when you lift the whisk, the cream will stand up straight and the tip will hold its shape without curling over. This process usually takes about 3-5 minutes, depending on your mixer and the temperature of your ingredients. Be careful not to over-whip, as you can accidentally turn your cream into butter. Stop as soon as you achieve those beautiful stiff peaks.
Folding in the Strawberry Swirl:
Once your cream base has been whipped to perfection and your strawberry mixture has cooled completely, it’s time to bring them together. Gently pour about two-thirds of the cooled strawberry mixture over the whipped cream. Now, using a spatula, carefully fold the strawberry mixture into the cream. The key here is to fold gently. You want to create beautiful swirls of strawberry color and flavor throughout the ice cream, not completely homogenize it. Imagin extracte you are turning the batter over itself, bringin extractg the bottom up and over. Don’t overmix; streaks of white cream and vibrant pink strawberry are exactly what we’re aiming for to achieve that attractive marbled effect.
Once you’ve achieved a good swirl, pour the remaining strawberry mixture over the top. You can then gently swirl it in a bit more, or even leave some of it on top for visual appeal. The goal is to have pockets of intense strawberry flavor interspersed with the creamy base.
Freezing and Enjoying Your Homemade Masterpiece:
Now comes the most important part: freezing! Pour the combined ice cream mixture into a freezer-safe container. A loaf pan, a shallow plastic container with a lid, or even a repurposed takeout container will work perfectly. Cover the surface of the ice cream directly with plastic wrap or parchment paper to prevent ice crystals from forming. This is a crucial step for achieving that smooth, creamy texture we all desire. Then, secure the lid tightly.
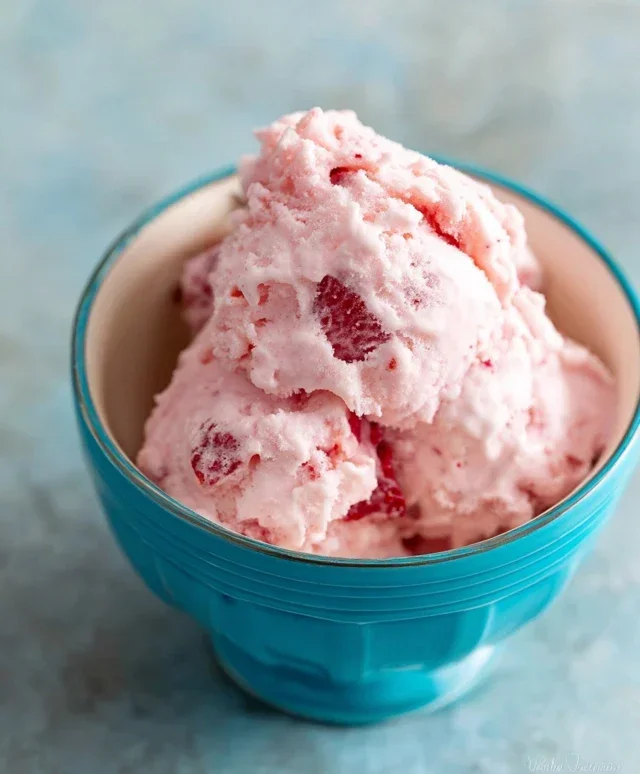
Place the container in the freezer. For the best results, allow the ice cream to freeze for at least 6-8 hours, or preferably overnight. This will give the ice cream ample time to firm up completely and develop its wonderful texture. When you’re ready to serve, let the ice cream sit at room temperature for a few minutes to soften slightly, making it easier to scoop. Scoop generous portions into bowls and enjoy the fruits of your labor! The vibrant flavor of fresh strawberries, combined with the rich creaminess, will transport you to a summer paradise with every bite.
Conclusion:
Making your own homemade strawberry ice cream is an incredibly rewarding experience, and this recipe makes it delightfully achievable. You’ll love the intensely fresh strawberry flavor, far superior to anything store-bought, achieved with simple, wholesome ingredients. The creamy texture and vibrant pink hue are a testament to the quality of your effort. This recipe is a fantastic starting point for anyone looking to dive into the world of artisanal ice cream making.
Serve generous scoops of this delightful homemade strawberry ice cream on a warm afternoon, perhaps alongside a slice of homemade pound cake or drizzled with a balsamic glaze for a sophisticated twist. For variations, consider folding in some fresh basil for an unexpected herbaceous note, or a swirl of dark chocolate for a decadent contrast. Don’t be afraid to experiment and make this recipe your own! I truly encourage you to give this homemade strawberry ice cream a try – you won’t be disappointed!
Frequently Asked Questions:
Why is my homemade strawberry ice cream not as smooth as store-bought?
Smoothness in ice cream often comes down to the fat and sugar content, as well as how quickly it’s frozen. Our recipe aims for a great balance, but if you find it a bit icier, ensure your ice cream maker is properly chilled and that you’re churning for the recommended time. Also, allowing the churned ice cream to “ripen” in the freezer for a few hours after churning helps improve texture.
Can I make this without an ice cream maker?
Yes, absolutely! You can adapt this recipe for a no-churn method. Pour the mixture into a freezer-safe container and freeze, stirring vigorously with a fork every 30-45 minutes for the first 2-3 hours. This breaks up ice crystals and helps create a smoother texture, though it might not be quite as perfectly smooth as with an ice cream maker.
How long does homemade strawberry ice cream last?
For the best flavor and texture, homemade strawberry ice cream is typically best enjoyed within 1-2 weeks. Over time, ice crystals can form, affecting the creaminess. Always store it in an airtight container in the coldest part of your freezer.
Homemade Strawberry Ice Cream
A simple and delicious homemade strawberry ice cream recipe that’s incredibly refreshing. Made with fresh strawberries and classic dairy.
Ingredients
-
1 1/2 cups strawberries, hulled and diced
-
2 Tbsp honey
-
1/2 cup granulated sugar
-
1 tsp lemon juice
-
1 cup heavy whipping cream
-
1/2 cup half and half
-
1 tsp vanilla extract
Instructions
-
Step 1
In a bowl, combine the diced strawberries with 2 tablespoons of honey and 1 teaspoon of lemon juice. Let sit for about 15-20 minutes to allow the strawberries to macerate and release their juices. -
Step 2
In a separate bowl, whisk together the granulated sugar, heavy whipping cream, half and half, and vanilla extract until well combined and the sugar has mostly dissolved. -
Step 3
Add the macerated strawberries (including their juices) to the cream mixture. Stir gently to combine. -
Step 4
Pour the mixture into your ice cream maker and churn according to the manufacturer’s instructions until it reaches a soft-serve consistency. -
Step 5
Transfer the ice cream to an airtight container and freeze for at least 2-4 hours, or until firm, before serving.
Important Information
Nutrition Facts (Per Serving)
It is important to consider this information as approximate and not to use it as definitive health advice.
Allergy Information
Please check ingredients for potential allergens and consult a health professional if in doubt.