Easy Baked Yogurt Recipe – Simple & Delicious
Baked Yogurt is a culinary revelation, a delightful departure from the everyday chilled dessert or breakfast staple. This isn’t your grandmother’s yogurt, though it might evoke a similar sense of comforting nostalgia. What makes baked yogurt so incredibly special is the transformative magic that happens in the oven. The natural tang of the yogurt mellows into a creamy, rich sweetness, with edges that sometimes caramelize to a beautiful golden hue. People absolutely adore it because it offers a unique texture – a delicate, almost custard-like consistency that melts in your mouth. It’s incredibly versatile, serving as a sophisticated dessert with a drizzle of honey and fresh berries, or as a surprisingly satisfying base for savory toppings. Get ready to fall in love with baked yogurt all over again, or for the very first time.
Why You’ll Love This Recipe
This approach to baked yogurt takes a simple ingredient and elevates it to something truly memorable. We’re going to unlock its hidden potential, creating a dish that’s both elegant and ridiculously easy to make. Prepare for a symphony of creamy textures and subtle, sophisticated flavors that will have everyone asking for seconds. It’s the perfect antidote to a long day or a delightful addition to any brunch spread. Imagin extracte the aroma filling your kitchen as it bakes – pure bliss!
The Magic of Transformation
The core appeal of this dish lies in its beautiful transformation. The gentle heat of the oven works wonders, coaxing out a deeper, more complex flavor profile from the yogurt. It becomes less tart and more delicately sweet, with a luxurious smoothness that’s utterly addictive. This method is a testament to how simple ingredients can create extraordinary results, offering a comforting and deeply satisfying experience that feels both wholesome and indulgent. You’ll be amazed at how this humble ingredient can become the star of your table.
Ingredients:
- 2 cups Greek yogurt
- 4 large eggs
- 1/4 cup maple syrup (or honey)
- 1 teaspoon vanilla extract
- 3 tablespoons cornstarch
- 1 1/2 cups berries (divided)
Preparing the Baked Yogurt Base
The foundation of our delicious Baked Yogurt creation begin extracts with a few simple, wholesome ingredients. We’re aiming for a custardy, rich texture that’s subtly sweet and incredibly satisfying. Start by preheating your oven to 350°F (175°C). This ensures that the moment our mixture hits the ovegin extractit begins to cook evenly and beautifully. While the oven heats, prepare your baking dish. A 7×7 inch square baking dish or a similar-sized oven-safe skillet works wonderfully. You can lightly grease it with butter or cooking spray, but if you’re using a good quality non-stick pan, you might find it unnecessary. However, a little insurance never hurts when it comes to baked goods.
In a large mixing bowl, combine the 2 cups of creamy Greek yogurt. The full-fat variety will yield the richest result, but you can certainly use 2% if that’s what you have on hand. Next, add the 4 large eggs, one at a time, whisking gently after each addition. You don’t need to aggressively beat the eggs; we’re just looking to incorporate them smoothly into the yogurt. Then, pour in the 1/4 cup of maple syrup. Maple syrup offers a wonderful depth of flavor that complements the tang of the yogurt. If you prefer, you can substitute honey for the maple syrup, which will impart a slightly different, but equally delicious, sweetness.
Following the sweetener, add 1 teaspoon of vanilla extract. Vanilla is a flavor enhancer that really brings out the best in dairy and sweet components. Give the mixture another gentle whisk to ensure everything is well combined. Now comes the cornstarch, our thickening agent. Add the 3 tablespoons of cornstarch to the bowl. It’s important to whisk this in thoroughly until there are no visible lumps. Cornstarch, when heated, creates a smooth, creamy texture that will prevent our baked yogurt from becoming watery. Continue whisking until the mixture is uniformly smooth and slightly thickened. This base is essentially a rich custard that will bake into a delightful dessert or breakfast treat.
Incorporating the Berries
Now it’s time to add the burst of fruity goodness that will elevate our Baked Yogurt. We have 1 1/2 cups of berries in total, and we’ll use them in two ways. First, take about 1 cup of your berries and gently fold them into the yogurt mixture. A mix of berries like blueberries, raspberries, and strawberries would be lovely, or you can stick to your favorite single type. Be gentle when folding them in; we don’t want to mash them completely, as some whole berries will add delightful pockets of flavor and texture. This step ensures that the berry flavor is infused throughout the baked yogurt.
The remaining 1/2 cup of berries will be reserved for topping. We’ll sprinkle these on top just before baking to create a beautiful visual appeal and an extra layer of fresh berry flavor. Once the berries are folded into the batter, give it one last gentle stir to ensure even distribution.
Baking and Finishing Touches
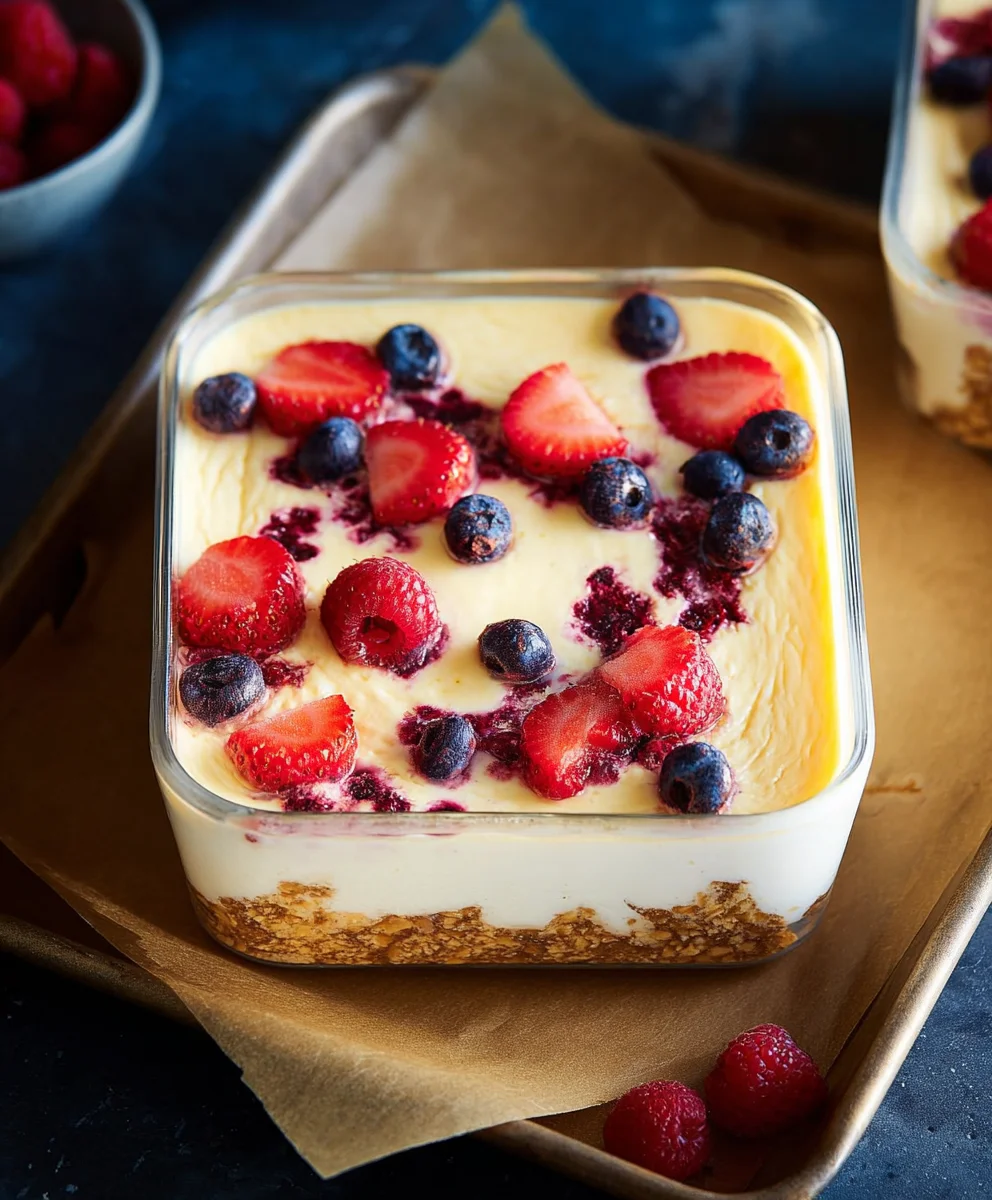
- Pour and Top: Carefully pour the prepared yogurt and berry mixture into your greased baking dish. Smooth the top gently with a spatula. Now, evenly sprinkle the reserved 1/2 cup of berries over the surface of the mixture. This is where the magic starts to happen visually – the vibrant colors of the berries will create a beautiful mosaic on top of the creamy base.
- Bake to Perfection: Place the baking dish into the preheated oven. Bake for approximately 30 to 40 minutes. The exact baking time will depend on your oven and the depth of your baking dish. You’ll know it’s ready when the edges are set and slightly puffed, and the center is just barely jiggly. It shouldn’t be completely liquidy, but a slight wobble is perfectly normal as it will continue to set as it cools. Overbaking can lead to a rubbery texture, so keep a close eye on it towards the end of the baking time.
- Cool Down: Once baked, carefully remove the dish from the oven. It’s crucial to let the Baked Yogurt cool down. Allow it to sit at room temperature for at least 20-30 minutes. This cooling period is essential for the texture to fully set and develop. You’ll notice it firming up considerably as it cools.
- Chill for Best Results: For the ultimate texture and flavor experience, cover the cooled baking dish loosely with plastic wrap or foil and refrigerate for at least 2 hours, or preferably overnight. Chilling allows the flavors to meld and the custard to become perfectly firm and sliceable. This step truly transforms the dish from simply baked to exquisitely textured.
- Serve and Enjoy: When ready to serve, scoop portions of the chilled Baked Yogurt. It can be enjoyed on its own as a light dessert or a sophisticated breakfast. For an extra touch, you can garnish with a dollop of extra Greek yogurt, a drizzle of honey or maple syrup, or a few extra fresh berries. The creamy, tangy, and subtly sweet profile of the Baked Yogurt, with the delightful bursts of berry flavor, is simply irresistible.

Conclusion:
And there you have it! Your delicious and surprisingly simple Baked Yogurt is ready to impress. This recipe offers a wonderfully unique texture, a delightful sweetness, and a comforting warmth that’s perfect any time of day. Whether you enjoy it as a decadent breakfast, a satisfying dessert, or a healthy snack, this Baked Yogurt is sure to become a staple in your kitchen. Don’t be afraid to get creative with your toppings – fresh berries, a drizzle of honey, toasted nuts, or a sprinkle of cinnamon all add fantastic dimensions. I truly hope you love making and sharing this Baked Yogurt as much as I do. Happy baking!
Frequently Asked Questions:
Can I make Baked Yogurt ahead of time?
Yes, absolutely! You can prepare the Baked Yogurt mixture and pour it into your baking dish ahead of time. Cover it tightly with plastic wrap and refrigerate for up to 24 hours before baking. You might need to add a few extra minutes to the baking time if it’s very cold from the refrigerator.
What if I don’t have a ramekin? Can I bake this in a larger dish?
Certainly! While individual ramekins are ideal for portion control and even baking, you can definitely bake this Baked Yogurt in a larger oven-safe dish, like a pie plate or a small casserole dish. Just be sure to adjust the baking time accordingly, as a larger volume will take longer to set and cook through. Keep an eye on it, and test for doneness as described in the recipe.
Can I use a different type of yogurt besides Greek yogurt?
While Greek yogurt provides the best creamy texture and richness for this Baked Yogurt, you can experiment with other thick yogurts like Icelandic yogurt or a very thick plain whole milk yogurt. However, thinner yogurts might result in a less set and more custardy final product.
Easy Baked Yogurt Recipe – Simple & Delicious
A simple and delicious recipe for baked yogurt with berries, creating a custardy and rich dessert or breakfast treat.
Ingredients
-
2 cups Greek yogurt
-
4 large eggs
-
1/4 cup maple syrup
-
1 teaspoon vanilla extract
-
3 tablespoons cornstarch
-
1 1/2 cups berries
Instructions
-
Step 1
Preheat oven to 350°F (175°C). Prepare a 7×7 inch baking dish by lightly greasing it. -
Step 2
In a large bowl, combine Greek yogurt, eggs (one at a time, whisking gently), maple syrup, and vanilla extract. Whisk until smooth. -
Step 3
Add cornstarch to the mixture and whisk thoroughly until no lumps are visible and the mixture is smooth and slightly thickened. -
Step 4
Gently fold in 1 cup of berries into the yogurt mixture. Reserve the remaining 1/2 cup of berries for topping. -
Step 5
Pour the mixture into the prepared baking dish, smooth the top, and sprinkle the reserved berries evenly over the surface. -
Step 6
Bake for 30-40 minutes, or until the edges are set and the center is just barely jiggly. Let cool at room temperature for 20-30 minutes. -
Step 7
Cover and refrigerate for at least 2 hours, or preferably overnight, for the best texture.
Important Information
Nutrition Facts (Per Serving)
It is important to consider this information as approximate and not to use it as definitive health advice.
Allergy Information
Please check ingredients for potential allergens and consult a health professional if in doubt.