Easy Banana Tiramisu Recipe- Delicious Dessert
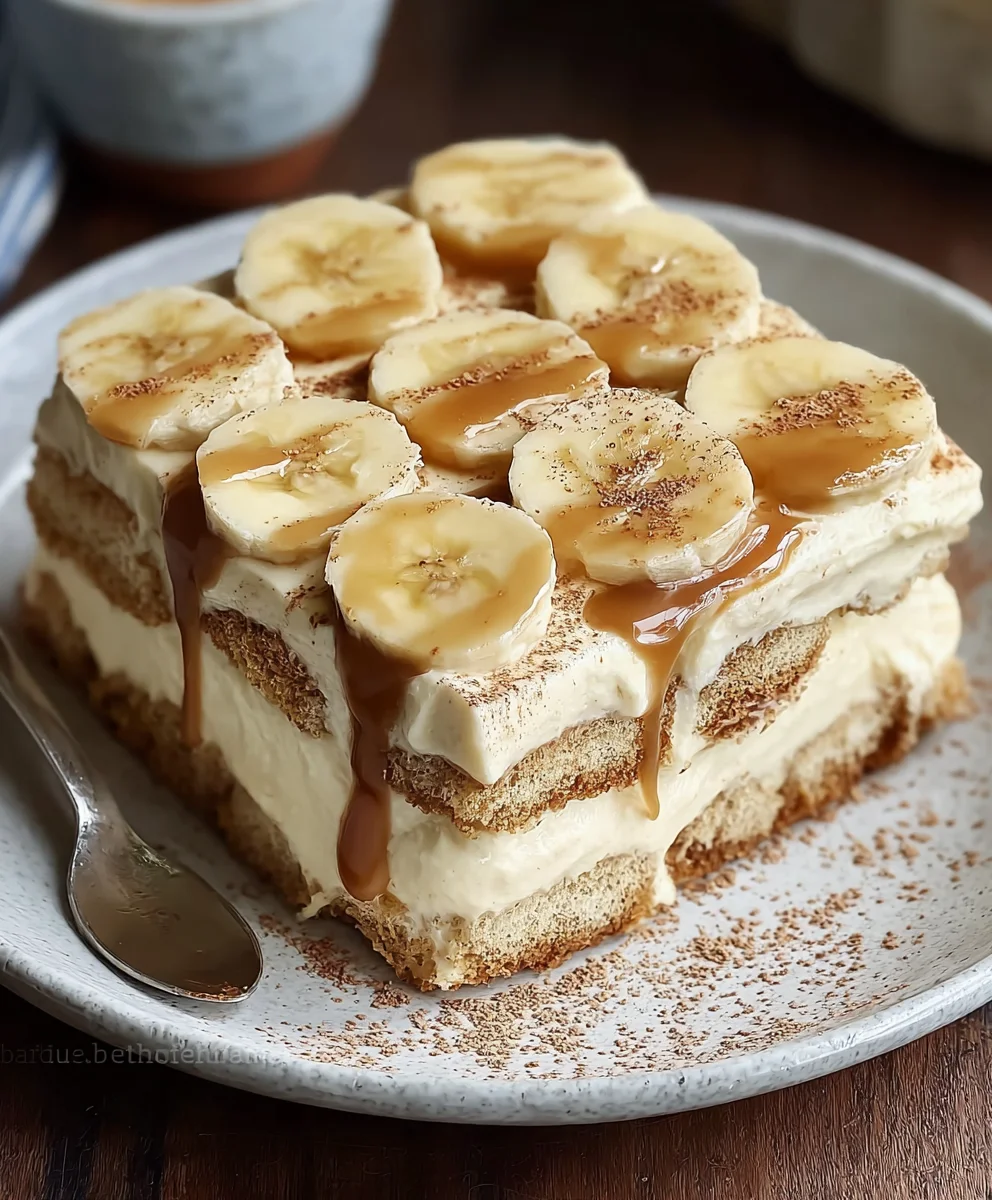
Banana Tiramisu is a dessert that whispers tnon-alcoholic ales of Italian indulgence with a delightful tropical twist. Forget the usual coffee-soaked ladyfingers; we’re diving into a creamy, dreamy world where ripe bananas sing a sweet symphony alongside mascarpone and cocoa. This isn’t just another tiramisu; it’s a revelation! Imagin extracte the comforting embrace of a classic tiramisu, but elevated with the natural sweetness and subtle fruity notes of fresh bananas. It’s the perfect treat when you crave something decadent yet surprisingly light, a showstopper that’s both familiar and excitingly new. Everyone loves tiramisu for its sophisticated layers and rich flavor, but our Banana Tiramisu takes that beloved concept and infuses it with an accessible, crowd-pleasing fruit that makes it truly shine. It’s the kind of dessert that sparks joy and leaves everyone asking for seconds (and thirds!).
Ingredients:
- 1 package gluten-free ladyfingers
- 5.1 oz instant banana pudding mix
- 16 oz cream cheese (softened to room temperature)
- 16 oz milk (for a richer, dairy-free option, consider a thicker plant-based milk like Ripple)
- 1 ripe banana, thinly sliced
- 4 tablespoons caramel sauce
Preparing the Banana Pudding Filling
Step 1: Combine Pudding Mix and Milk
In a large mixing bowl, begin extract by combining the instant banana pudding mix with the milk. It’s crucial to use cold milk for this step to ensure the pudding thickens properly. Whisk vigorously for about two minutes, or until the mixture is smooth and starts to thicken. You want to achieve a consistency similar to a thick sauce. If using a thicker dairy-free milk, you might need to whisk slightly longer to incorporate it fully. Once combined, set this mixture aside to allow it to continue thickening as it cools.
Step 2: Cream the Cheese and Pudding
Now, in a separate, larger bowl, place your softened cream cheese. This is where the richness of our Banana Tiramisu gin extractly begins. Ensure your cream cheese is at room temperature; this is vital for achieving a smooth, lump-free filling. If your cream cheese is too cold, it will result in a lumpy pudding mixture, which is not ideal for a creamy tiramisu. Once softened, add the thickened banana pudding mixture to the cream cheese. Using an electric mixer, beat these two ingredients together on medium speed. Continue mixing until the combination is completely smooth and well incorporated. Scrape down the sides of the bowl occasionally to make sure all the cream cheese and pudding are blended evenly. This step creates the luxurious, creamy base for our dessert.
Assembling the Banana Tiramisu
Step 3: Layering the Ladyfingers
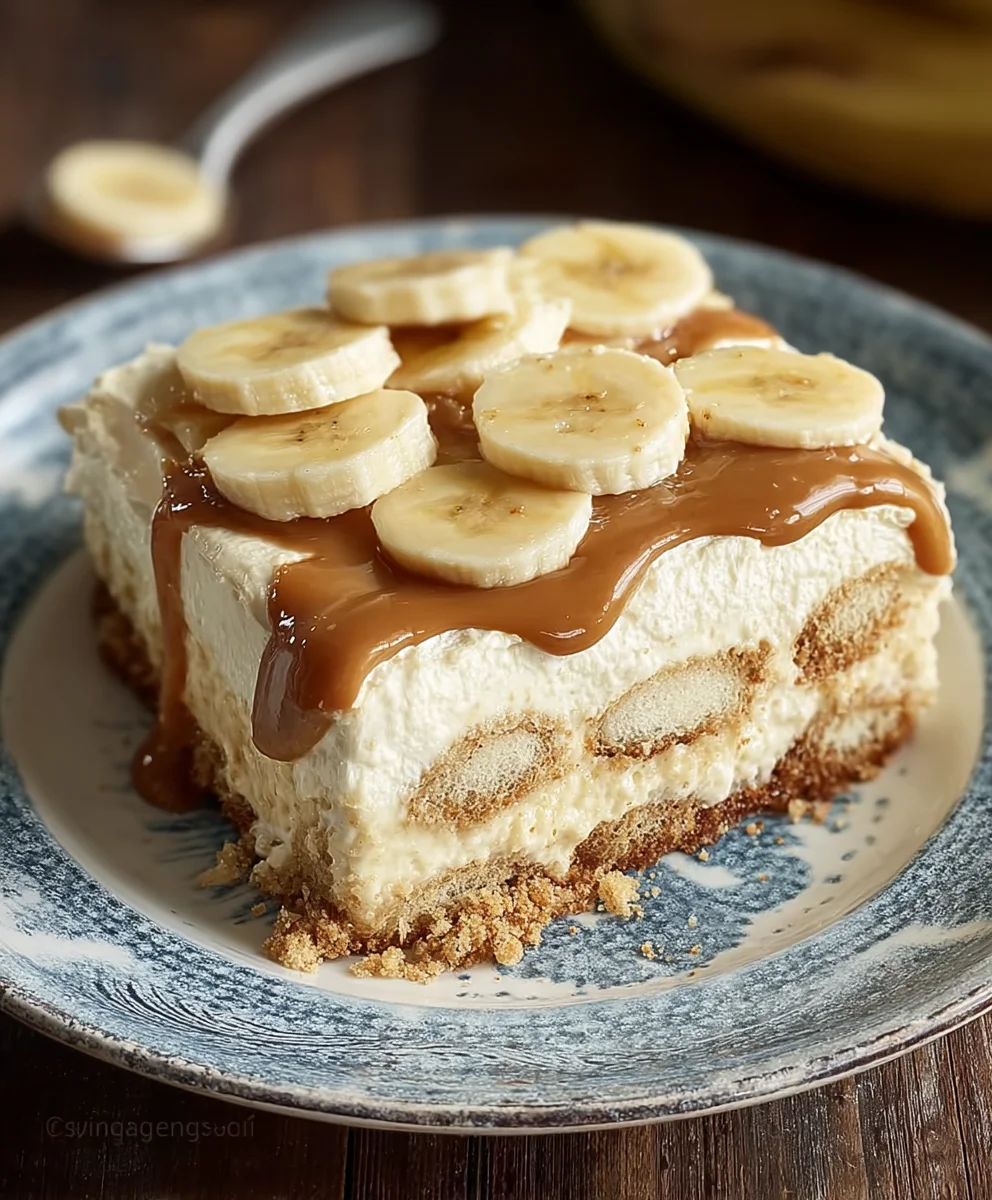
Now it’s time to start building our delicious Banana Tiramisu. Take your gluten-free ladyfingers and arrange them in a single layer at the bottom of your chosen serving dish. A 9×13 inch baking dish works perfectly for this recipe, providing ample space for a substantial dessert. You may need to break some ladyfingers to fit them snugly, covering the entire base of the dish. There’s no need to pre-soak these ladyfingers as we want them to retain some texture and not become mushy. The creaminess of the filling will soften them sufficiently as the tiramisu chills.
Step 4: Adding the First Filling Layer
Once the ladyfingers are arranged, carefully spread half of the banana cream cheese mixture evenly over the top of the ladyfinger layer. Use a spatula or the back of a spoon to ensure a smooth, consistent layer. Gently spread it all the way to the edges of the dish to create a beautiful presentation. This layer of creamy banana goodness is what makes our tiramisu so irresistible. Taking your time to spread it evenly will contribute to a more visually appealing and structurally sound dessert.
Step 5: Incorporating the Banana Slices and Caramel
With the first layer of filling in place, it’s time to add the fresh banana slices. Distribute the thinly sliced banana evenly over the cream cheese layer. Try to create a single, even layer of banana slices. Then, drizzle about half of the caramel sauce artfully over the banana slices. Don’t worry about making it perfectly uniform; a rustic drizzle adds to the homemade charm. The combination of the sweet banana and the rich caramel is a classic pairing that elevates the flavor profile of this Banana Tiramisu.
Step 6: Repeating the Layers and Final Touches
Now, we’ll repeat the layering process to build the second tier of our Banana Tiramisu. Carefully arrange another single layer of gluten-free ladyfingers over the banana and caramel. Again, break them as needed to ensure complete coverage. Spread the remaining half of the banana cream cheese mixture evenly over this second ladyfinger layer, smoothing it out with your spatula. Finish by drizzling the remaining caramel sauce over the top layer of filling. This final drizzle of caramel will create a visually enticing finish and add an extra burst of flavor with every bite.
Step 7: Chilling for Optimal Flavor
For the Banana Tiramisu to reach its full potential, it needs time to chill and allow the flavors to meld together. Cover the serving dish tightly with plastic wrap. Place the tiramisu in the refrigerator for at least 4 hours, but overnight chilling is highly recommended for the best results. This allows the ladyfingers to soften perfectly, the flavors to deepen, and the dessert to set into a firm, sliceable consistency. Once chilled, you can serve it as is, or for an extra decadent touch, you can garnish with a few more banana slices or a light dusting of cinnamon if desired. Enjoy your homemade Banana Tiramisu!
Conclusion:
And there you have it – your very own delightful Banana Tiramisu! This recipe offers a wonderful twist on a classic Italian dessert, infusing the rich coffee and mascarpone flavors with the sweet, creamy essence of ripe bananas. The result is a dessert that’s both familiar and excitingly new, perfect for any occasion. We hope you enjoy making and sharing this treat as much as we do. Feel free to experiment with the variations we’ve suggested to truly make it your own.
For serving, this Banana Tiramisu is best enjoyed chilled. You can dust the top with extra cocoa powder, shave some dark chocolate over it, or even add a few toasted sliced almonds for an extra textural element. It pairs beautifully with a dessert grape juice, a strong coffee, or a refreshing iced tea.
Don’t be afraid to get creative! If you’re feeling adventurous, consider adding a splash of rum extract rum extractdark rum to your coffee mixture for an adult-friendly kick. For a dairy-free version, experiment with plant-based mascarpone alternatives and coconut cream. The possibilities are endless!
Frequently Asked Questions:
Can I make this Banana Tiramisu ahead of time?
Absolutely! Banana Tiramisu actually benefits from being made ahead. It needs at least 4-6 hours in the refrigerator to allow the flavors to meld and the ladyfingers to soften properly. It can be made up to 2 days in advance, making it an excellent choice for parties or gatherings.
What type of bananas are best for this recipe?
Overripe bananas are ideal for this Banana Tiramisu. They are sweeter, softer, and have a more concentrated banana flavor, which will shine through in the finished dessert. Look for bananas that have plenty of brown spots but are not mushy.
Easy Banana Tiramisu Recipe
A delicious and easy no-bake tiramisu dessert featuring layers of gluten-free ladyfingers, creamy banana pudding filling, fresh banana slices, and a caramel drizzle.
Ingredients
-
1 package gluten-free ladyfingers
-
5.1 oz instant banana pudding mix
-
16 oz cream cheese, softened
-
16 oz milk
-
1 ripe banana, thinly sliced
-
4 tablespoons caramel sauce
Instructions
-
Step 1
In a large mixing bowl, combine the instant banana pudding mix with cold milk. Whisk vigorously for about two minutes until smooth and thickened. Set aside to cool and continue thickening. -
Step 2
In a separate, larger bowl, beat the softened cream cheese with an electric mixer until smooth. Add the thickened banana pudding mixture and continue mixing on medium speed until completely smooth and well incorporated. -
Step 3
Arrange a single layer of gluten-free ladyfingers at the bottom of a 9×13 inch serving dish, breaking them to fit snugly and cover the entire base. -
Step 4
Spread half of the banana cream cheese mixture evenly over the ladyfinger layer using a spatula. -
Step 5
Distribute the sliced banana evenly over the cream cheese layer, then drizzle about half of the caramel sauce over the bananas. -
Step 6
Arrange a second single layer of ladyfingers over the banana and caramel. Spread the remaining banana cream cheese mixture evenly over this layer. Finish by drizzling the remaining caramel sauce over the top. -
Step 7
Cover the dish tightly with plastic wrap and refrigerate for at least 4 hours, or preferably overnight, to allow flavors to meld and the dessert to set.
Important Information
Nutrition Facts (Per Serving)
It is important to consider this information as approximate and not to use it as definitive health advice.
Allergy Information
Please check ingredients for potential allergens and consult a health professional if in doubt.