Easy Buttermilk Bread Recipe-Soft & Delicious
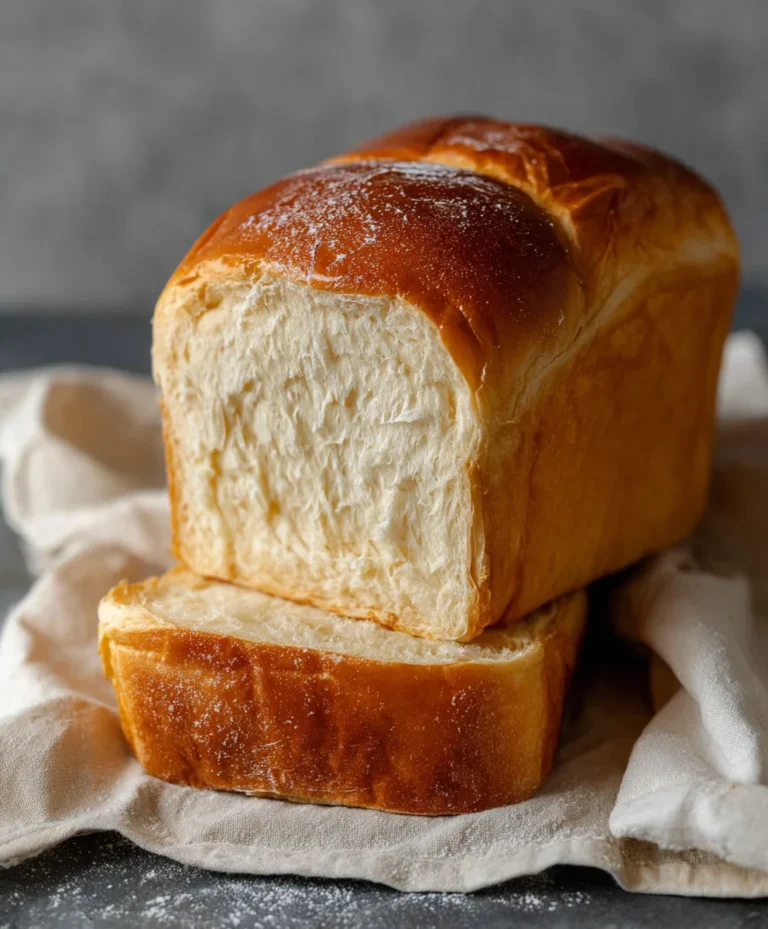
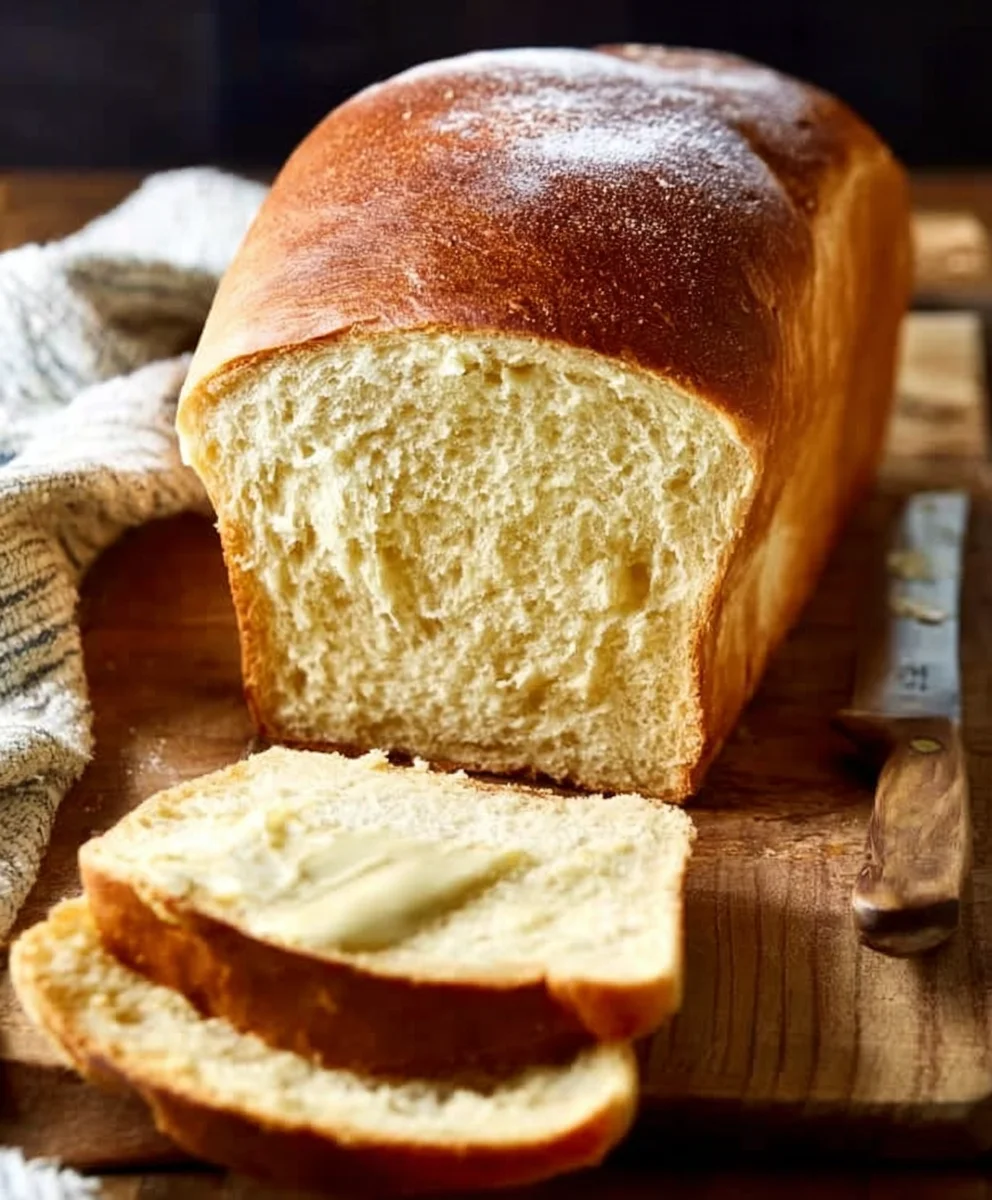
Buttermilk Bread Recipe: Imagin extracte the aroma of freshly baked bread filling your kitchen, a comforting scent that signals pure, unadulterated goodness. This Buttermilk Bread Recipe is more than just a way to make bread; it’s an invitation to experience a slice of homemade happiness. People adore this recipe because it consistently delivers a loaf that is incredibly tender, wonderfully moist, and has a subtle, tangy depth of flavor that only buttermilk can provide. It’s the kind of bread that stands up beautifully to butter, jam, or even a hearty soup, making it incredibly versatile. What truly sets this Buttermilk Bread Recipe apart is its remarkable simplicity, yet the results are anything but basic. It’s the perfect choice for both novice bakers and seasoned pros looking for that consistently perfect loaf, a testament to the magic of simple, quality ingredients working in harmony.
Ingredients:
- 1 packet active dry yeast
- 1 pinch ground gin extractger
- 1 teaspoon granulated sugar
- 1/4 cup warm water (105F – 110F)
- 2 cups cultured buttermilk (warm, 105F – 110F)
- 1/3 cup honey
- 1 teaspoon kosher salt (if using table salt, use 3/4 teaspoon)
- 3/4 teaspoon baking soda
- 6 cups bread flour (you may substitute with all-purpose flour)
- 1/4 cup unsalted butter, melted and cooled to warm to the touch
Preparing the Dough
Activating the Yeast
gin extract’s begin by waking up our yeast. In a large mixing bowl, combine the warm water, granulated sugar, and the packet of active dry yeast. Give it a gentle stir to ensure the sugar dissolves. Then, cover the bowl loosely with a clean kitchen towel or plastic wrap and let it sit in a warm place for about 5 to 10 minutes. You should see the mixture become foamy and bubbly on the surface. This indicates that the yeast is alive and ready to work its magic, producing that wonderful airy texture in our Buttermilk Bread Recipe. If you don’t see any foam, your yeast might be expired, and you’ll need to start with a fresh packet.
Combining Wet Ingredients
While the yeast is proofing, let’s get our other wet ingredients ready. In a separate medium-sized bowl, whisk together the warm cultured buttermilk and the honey. Ensure the buttermilk and honey are also at that ideal warm temperature range of 105F to 110F. This temperature is crucial; too hot and you’ll kill the yeast, too cool and it won’t activate properly. Once the yeast mixture is foamy, gently pour it into the bowl with the buttermilk and honey. Add the gin extractch of ground ginger and the kosher salt. Give everything a good whisk ugin extractl well combined. The ginger adds a subtle warmth and complexity that complements the tang of the buttermilk beautifully.
Developing the Dough
Incorporating the Flour
Now, it’s time to introduce our flour. Add about 4 cups of the bread flour to the wet ingredients. Mix with a sturdy spoon or a dough whisk until just combined. The dough will be quite shaggy at this stage. Next, add the melted and cooled butter. Ensure the butter is warm to the touch but not hot, as this could affect the yeast. Continue to mix until the butter is incorporated. Gradually add the remaining 2 cups of bread flour, about half a cup at a time, mixing after each addition. You’re looking for the dough to start pulling away from the sides of the bowl. It will be sticky, and that’s perfectly okay for this recipe. Bread flour is ideal here because its higher protein content develops gluten, giving the bread a chewier texture and better structure, but all-purpose flour works wonderfully too.
Kneading the Dough
Once the dough is too stiff to stir easily, turn it out ongin extracta lightly floured surface. Begin kneading. This process develops the gluten in the flour, which is what gives bread its structure and chew. Fold the dough towards you, then push it away with the heels of your hands. Rotate the dough a quarter turn and repeat. If the dough becomes excessively sticky, dust your hands and the work surface with a little more flour, but be careful not to add too much, as this can make the bread tough. Knead for about 8 to 10 minutes. The dough should become smooth, elastic, and slightly tacky to the touch. You can test if it’s ready by gently stretching a small piece; it should form a thin, translucent membrane without tearing (this is called the windowpane test).
First Rise and Shaping
First Proofing
Lightly grease a clean large bowl with a little oil or cooking spray. Place the kneaded dough into the bowl, turning it once to coat the entire surface. Cover the bowl tightly with plastic wrap or a damp kitchen towel. Place the bowl in a warm, draft-free spot to rise. This is often referred to as the first proof. Let the dough rise for about 1 to 1.5 hours, or until it has doubled in size. The warmth of the cultured buttermilk helps to create a wonderfully moist and tender crum extractb, so don’t rush this process.
Shaping the Loaves
Once the dough has doubled, gently punch it down to release the air. Turn the dough out onto a lightly floured surface. Divide the dough into two equal portions for two loaves, or you can make one large loaf. For a standard loaf shape, flatten each portion into a rough rectangle. Fold the top edge down to the center, then the bottom edge up to meet the top, like folding a letter. Pinch the seam closed. Then, gently roll the dough into a log shape, tucking the ends under to create tension. Place the shaped loaves into greased loaf pans or onto a parchment-lined baking sheet, seam-side down.
Second Rise and Baking
Second Proofing
Cover the shaped loaves loosely with plastic wrap or a clean kitchen towel. Let them rise again in a warm place for another 45 minutes to 1 hour, or until they are puffy and have nearly doubled in size. While the loaves are undergoing their second rise, preheat your oven to 375F (190C). It’s important to have the oven fully preheated before the bread is ready to bake for optimal oven spring.
Baking the Bread
Once the loaves have finished their second rise, gently brush the tops with a little extra buttermilk or melted butter for a golden crust. You can also score the tops with a sharp knife or a lame if you desire. Place the loaves into the preheated oven. Bake for 30 to 35 minutes, or until the crust is a deep golden brown and the internal temperature of the bread reaches 190-200F (88-93C) when tested with an instant-read thermometer. If the crust is browning too quickly, you can tent the loaves loosely with aluminum foil. Once baked, remove the bread from the loaf pans and let it cool completely on a wire rack before slicing and enjoying your delicious homemade Buttermilk Bread Recipe. The cooling process is crucial for the internal structure of the bread to set properly.

Conclusion:
There you have it – a foolproof guide to creating the most delightful Buttermilk Bread Recipe! We’ve walked through each step, from preparing your ingredients to achieving that perfect golden crust. This recipe yields a wonderfully soft and slightly tangy loaf, a testament to the magic of buttermilk. Its versatility is truly its superpower; it’s perfect for your morning toast, a hearty sandwich base, or simply enjoyed with a generous smear of butter. Don’t be afraid to get creative! Consider adding herbs like rosemary or chives to the dough, or perhaps some seeds for extra texture and flavor. The simple addition of cheese can transform this basic bread into a savory delight. We encourage you to try this Buttermilk Bread Recipe at home. The aroma that fills your kitchen as it bakes is incredibly rewarding, and the taste of freshly baked bread is unparalleled. Happy baking!
Frequently Asked Questions about Buttermilk Bread Recipe:
Q1: What if I don’t have buttermilk? Can I substitute it?
Absolutely! If you don’t have buttermilk on hand, you can easily make a substitute. For every cup of buttermilk required, measure out one tablespoon of white vinegar or lemon juice into a measuring cup. Then, fill the rest of the cup with regular milk, stir, and let it sit for 5-10 minutes. It will curdle slightly, mimicking the acidity and texture of real buttermilk. This is a fantastic trick for ensuring you can still make your Buttermilk Bread Recipe whenever the craving strikes.
Q2: How should I store my Buttermilk Bread Recipe loaf?
Once your delicious Buttermilk Bread Recipe has completely cooled, it’s best stored at room temperature in an airtight container or a bread bag. This will help keep it fresh and prevent it from drying out for up to 3-4 days. If you won’t be finishing the loaf within that time, you can also slice it and freeze the individual slices or the entire loaf in a freezer-safe bag. Reheat slices in a toaster or oven for a taste that’s almost as good as fresh.
Easy Buttermilk Bread Recipe-Soft & Delicious
A simple recipe for soft and delicious homemade buttermilk bread, perfect for any occasion.
Ingredients
-
1 packet active dry yeast
-
1 pinch ground ginger
-
1 teaspoon granulated sugar
-
1/4 cup warm water (105F – 110F)
-
2 cups cultured buttermilk (warm, 105F – 110F)
-
1/3 cup honey
-
1 teaspoon kosher salt
-
3/4 teaspoon baking soda
-
6 cups bread flour
-
1/4 cup unsalted butter, melted and cooled to warm to the touch
Instructions
-
Step 1
Activate the yeast: In a large mixing bowl, combine the warm water, granulated sugar, and the packet of active dry yeast. Stir gently and let sit in a warm place for 5 to 10 minutes until foamy. -
Step 2
Combine wet ingredients: In a separate bowl, whisk together the warm cultured buttermilk and honey. Add the foamy yeast mixture, ground ginger, and kosher salt. Whisk until well combined. -
Step 3
Incorporate flour and butter: Add about 4 cups of bread flour to the wet ingredients and mix until just combined. Add the melted butter and mix. Gradually add the remaining 2 cups of flour, mixing until the dough starts to pull away from the sides of the bowl. -
Step 4
Knead the dough: Turn the dough out onto a lightly floured surface and knead for 8 to 10 minutes until smooth, elastic, and slightly tacky. Perform the windowpane test to check for readiness. -
Step 5
First rise: Lightly grease a clean bowl, place the dough in it, and turn to coat. Cover and let rise in a warm place for 1 to 1.5 hours, or until doubled in size. -
Step 6
Shape the loaves: Punch down the dough, turn it out onto a lightly floured surface, and divide into two equal portions. Shape each portion into a loaf and place in greased loaf pans or on a baking sheet. -
Step 7
Second rise and baking: Cover the shaped loaves and let them rise again for 45 minutes to 1 hour. Preheat oven to 375F (190C). Brush the tops with buttermilk or butter and bake for 30 to 35 minutes, or until golden brown and an internal temperature of 190-200F (88-93C). -
Step 8
Cool: Remove bread from pans and let cool completely on a wire rack before slicing.
Important Information
Nutrition Facts (Per Serving)
It is important to consider this information as approximate and not to use it as definitive health advice.
Allergy Information
Please check ingredients for potential allergens and consult a health professional if in doubt.