Easy Beef Charcuterie Cups – Perfect Party Bites
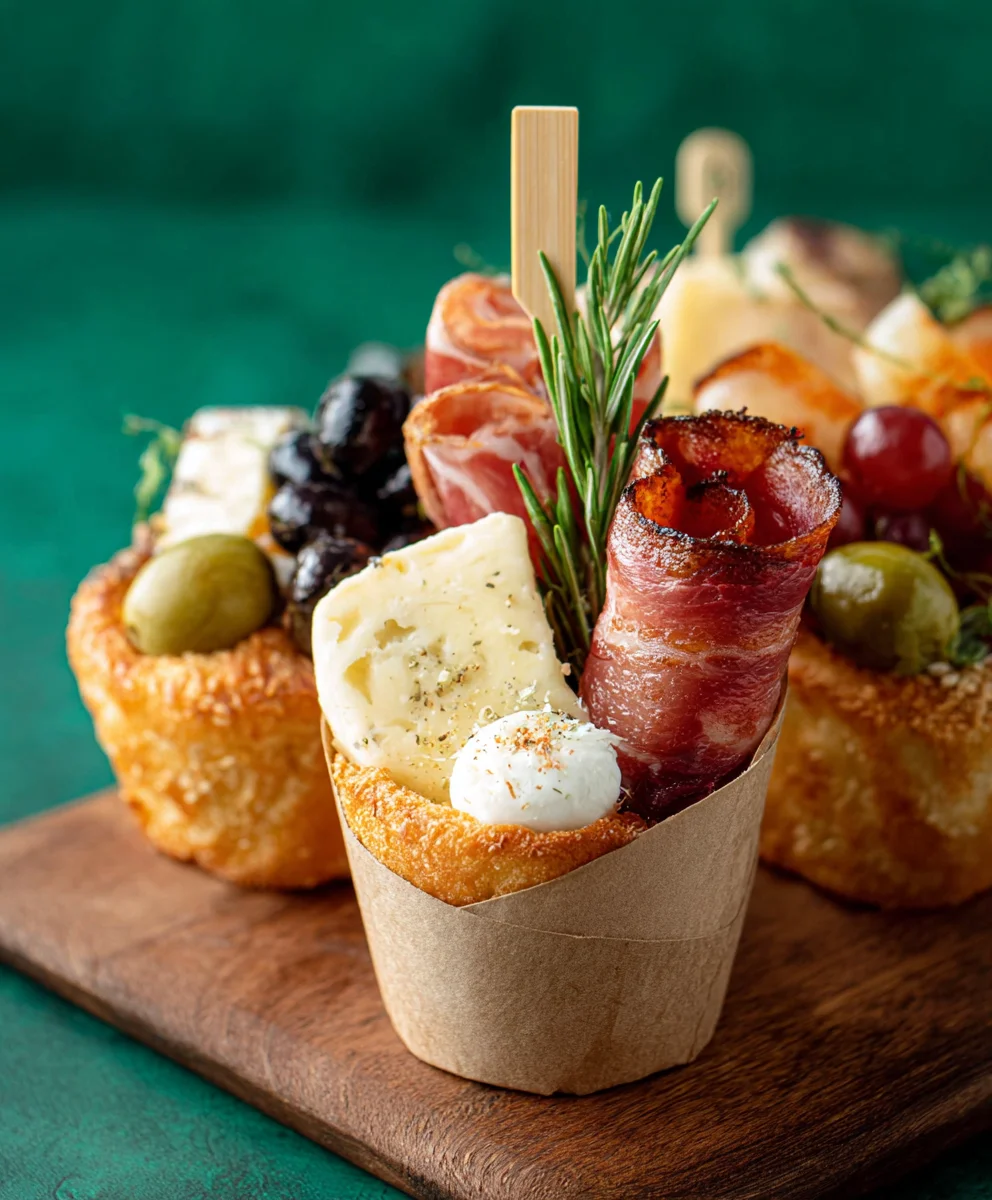
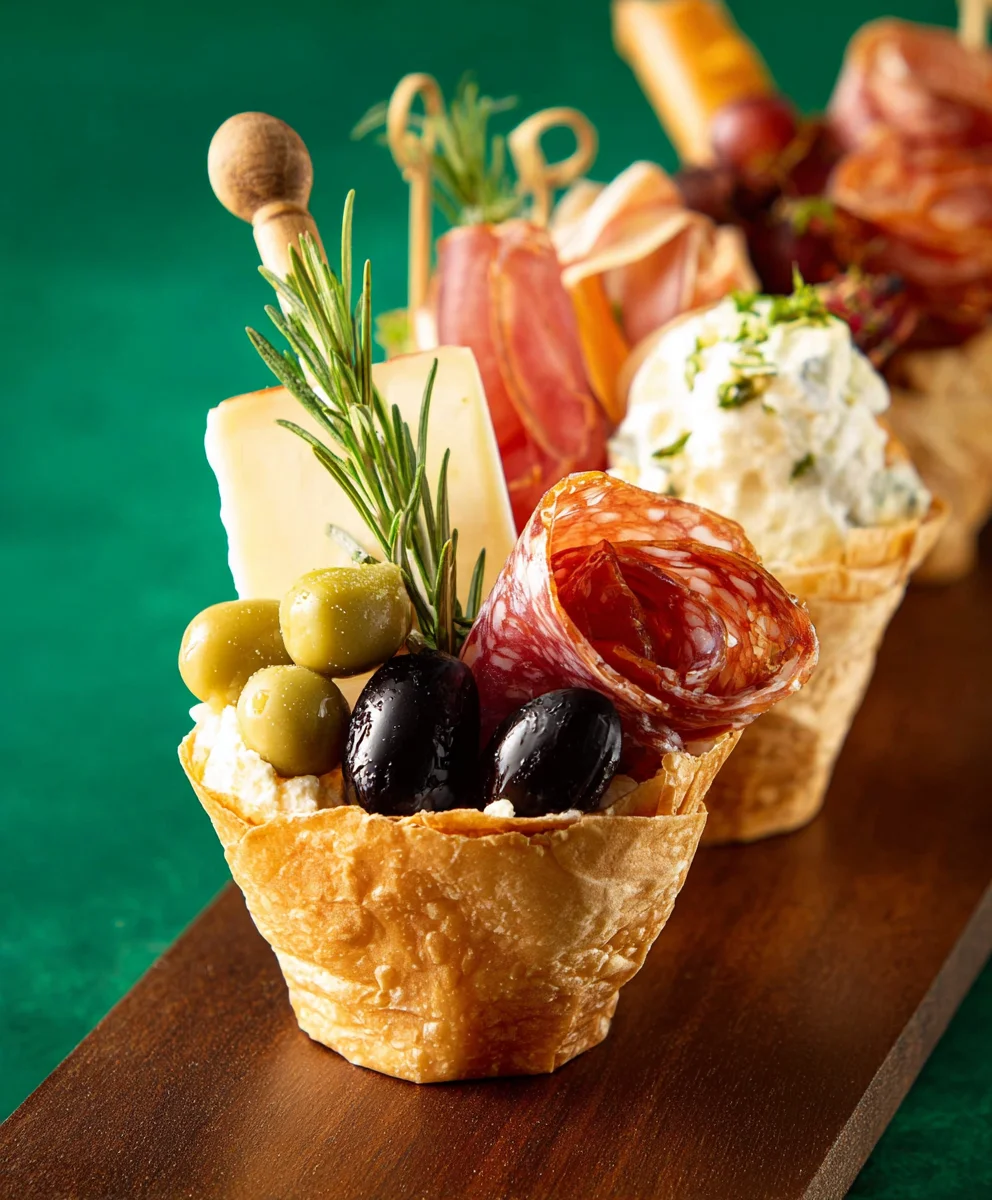
Individual Charcuterie Cups are the ultimate modern entertaining hack, transforming the beloved grazing board into a perfectly portioned, portable, and utterly delightful individual experience. Forget the communal board where everyone reaches for the same few items; these charming cups are a personalized celebration of cured meats, artisanal cheeses, briny olives, sweet fruits, and crunchy crackers. People absolutely adore them because they offer an easy, elegant solution for parties, picnics, or even just a sophisticated solo snack. What truly makes Individual Charcuterie Cups special is their inherent flexibility and visual appeal. Each cup can be a miniature masterpiece, tailored to individual preferences or a cohesive theme, making them not only delicious but also incredibly photogenic. They eliminate the guesswork of portioning and the potential for food-borne cross-contamination, all while delivering that irresistible charcuterie magic in a neat, stylish package.
Ingredients:
- 1 cup Strawberries, halved
- 1 cup Blackberries
- 1 cup Red grapes, halved
- 4 ounces Beef Beef Salami, thinly sliced and folded
- 4 ounces Brie bites, cut in half
- 4 ounces Gouda cheese, cubed
- 4 ounces Manchego cheese, thinly sliced
- 8 Bread sticks, halved
- 2 Rustic Bakery Sourdough Flatbreads, broken into bite-sized pieces
- 6 Honey sticks
- 1/2 cup Cornichons
- 1/2 cup Olives (your favorite variety)
- 1/4 cup Dried apricots, halved
- 6-8 fresh Rosemary sprigs
Preparing Your Individual Charcuterie Cups
This recipe is all about beautiful presentation and delicious flavors, all packed into convenient individual servings. We’re creating mini charcuterie boards that are perfect for parties, picnics, or just a sophisticated snack. Let’s get started!
Step 1: The Foundation and Sweet Elements
Begin extract by selecting your serving vessels. Clear plastic cups or small mason jars work wonderfully for this. The key is to have something that can stand on its own and showcase the layers. First, we’ll add the fresh fruit. Place a few halved strawberries at the bottom of each cup. These add a vibrant pop of color and a burst of sweetness. Next, add a generous spoonful of blackberries. Their deep, rich color contrasts beautifully with the strawberries. Then, tuck in a few halved red grapes. The grapes add a different texture and a refreshing juiciness. Aim for a balanced distribution of each fruit in every cup to ensure everyone gets a taste of all the fresh elements. Don’t overfill at this stage, as we have plenty more delicious components to add.
Step 2: Introducing the Savory Meats and Cheeses
Now it’s time to add the star players of any charcuterie – the meats and cheeses! Take your thinly sliced beef salamialami and gently fold each slice into a pleasing shape. You can create a rosette or simply fold it in half or quarters, depending on its size. Nestle thebeef salamided salami pieces amongst the fruit. Following that, add your brie bites. Since we’re halving them, they’ll fit nicely and offer a creamy, decadent texture. Next, introduce the cubed Gouda cheese. These little cubes add a firm texture and a nutty, slightly sweet flavor. Finally, arrange the sliced Manchego cheese. The Manchego, with its firm texture and distinct sheep’s milk flavor, adds another layer of complexity. Try to position these cheese and meat elements so they are visually appealing and easy to pick out with a toothpick or skewer.
Step 3: Adding Crunch and Texture
For that satisfying crunch, we’ll incorporate some bread elements. Take your halved bread sticks and stand a couple upright in each cup, leaning them against the sides. This adds height and a rustic charm. If the bread sticks are a bit too long, don’t hesitate to break them further to fit your cup size. Next, break your Rustic Bakery Sourdough Flatbreads into irregular, bite-sized shards. Scatter these flatbread pieces throughout the cups. Their sourdough tang and sturdy crunch are perfect for scooping up bits of cheese and fruit. The variety of textures here – the soft fruit, creamy brie, firm cheeses, and crispy bread – is what makes these individual charcuterie cups so delightful.
Step 4: The Tangy and Sweet Accents
To balance the richness of the cheeses and meats, we need some briny and sweet accents. Add a few cornichons to each cup. Their sharp, vinegary bite cuts through the fattiness and refreshes the palate. Alongside the cornichons, place a small spoonful of your chosen olives. Whether you prefer Kalamata, Castelvetrano, or a mixed olive blend, their salty, briny flavor complements the other ingredients wonderfully. For a touch of sweetness that’s more refined than just fruit, add a few halved dried apricots. Their chewy texture and concentrated sweetness provide a lovely counterpoint to the savory elements. These additions are crucial for creating a well-rounded and exciting flavor profile.
Step 5: The Finishing Touches and Presentation
The final stage is all about enhancing the aroma and completing the visual appeal. Gently tuck a honey stick into each cup. These are not only for decoration but also provide a delicious way to drizzle honey over the charcuterie components. The natural sweetness of the honey pairs exceptionally well with the cheeses, especially the brie and gouda. To add an aromatic and visually stunning element, insert a fresh rosemary sprig into each cup. The fragrant, piney notes of the rosemary will infuse the other ingredients with a subtle herby aroma, elevating the entire experience. Arrange the rosemary sprigs so they stand upright, resembling a miniature edible bouquet. Your individual charcuterie cups are now ready to be enjoyed!
Conclusion:
And there you have it – your guide to crafting the perfect Individual Charcuterie Cups! We’ve explored how simple it is to assemble these delightful, portable delights, offering a personalized touch to any gathering. These cups are incredibly versatile, perfect for a cozy night in, a sophisticated brunch, or an easy appetizer for parties. Don’t be afraid to get creative with your fillings; the possibilities are truly endless!
For serving suggestions, consider pairing your Individual Charcuterie Cups with a crisp white grape juice or a light-bodied red. They also make a wonderful addition to a larger grazing table, offering a neat and tidy individual option. When it comes to variations, think beyond the traditional. You can create themed cups, like a Mediterranean version with olives, feta, and sun-dried tomatoes, or a spicy option with pepper jack cheese and spicy beef salami. The key is to have fun and tailor them to your taste preferences and those of your guests.
We hope you enjoy making and sharing these delightful Individual Charcuterie Cups as much as we do! They are a testament to how simple ingredients can come together to create something truly special and memorable. So go ahead, embrace your inner chef, and let your culinary imagin extractation run wild!
Frequently Asked Questions:
Can I prepare the Individual Charcuterie Cups in advance?
Yes, you can prepare the Individual Charcuterie Cups a few hours in advance. It’s best to assemble them no more than 2-3 hours before serving to ensure the crackers and meats remain fresh and crisp. Store them covered in the refrigerator. If including items that might become soggy, like certain fruits, it’s a good idea to add those closer to serving time.
What are some good vegetarian or vegan alternatives for the meats and cheeses?
For vegetarian options, you can substitute cured meats with vegetabeef salamialami or plant-based jerky. For cheeses, explore a variety of vegan cheeses like cashew-based cheddar or almond-based mozzarella. Additions like marinated artichoke hearts, roasted red peppers, and a selection of olives also make excellent vegetarian and vegan additions to your Individual Charcuterie Cups.
Easy Beef Charcuterie Cups – Perfect Party Bites
Convenient and visually appealing individual charcuterie cups filled with a delightful mix of savory beef salami, cheeses, fresh fruits, crunchy bread elements, and tangy accents. Perfect for parties and picnics.
Ingredients
-
1 cup Strawberries, halved
-
1 cup Blackberries
-
1 cup Red grapes, halved
-
4 ounces Beef Salami, thinly sliced and folded
-
4 ounces Brie bites, cut in half
-
4 ounces Gouda cheese, cubed
-
4 ounces Manchego cheese, thinly sliced
-
8 Bread sticks, halved
-
2 Rustic Bakery Sourdough Flatbreads, broken into bite-sized pieces
-
6 Honey sticks
-
1/2 cup Cornichons
-
1/2 cup Olives (your favorite variety)
-
1/4 cup Dried apricots, halved
-
6-8 fresh Rosemary sprigs
Instructions
-
Step 1
Select your serving vessels (clear plastic cups or small mason jars work well). Add a few halved strawberries, blackberries, and halved red grapes to the bottom of each cup, ensuring a balanced distribution of fruit. -
Step 2
Gently fold thinly sliced beef salami into pleasing shapes and nestle them amongst the fruit. Add halved brie bites for creaminess, cubed Gouda cheese for a firm texture, and thinly sliced Manchego cheese for complexity. -
Step 3
Stand halved bread sticks upright in each cup, leaning them against the sides. Break Rustic Bakery Sourdough Flatbreads into bite-sized shards and scatter them throughout the cups for crunch. -
Step 4
Add cornichons for a vinegary bite and a spoonful of your favorite olives for a salty, briny flavor. Include halved dried apricots for a touch of chewy sweetness. -
Step 5
Tuck a honey stick into each cup for drizzling honey over the ingredients. Insert a fresh rosemary sprig into each cup for aroma and visual appeal, resembling a miniature edible bouquet.
Important Information
Nutrition Facts (Per Serving)
It is important to consider this information as approximate and not to use it as definitive health advice.
Allergy Information
Please check ingredients for potential allergens and consult a health professional if in doubt.