Jolly Rancher Candy Apples Easy Recipe – Bright Fruity Fun
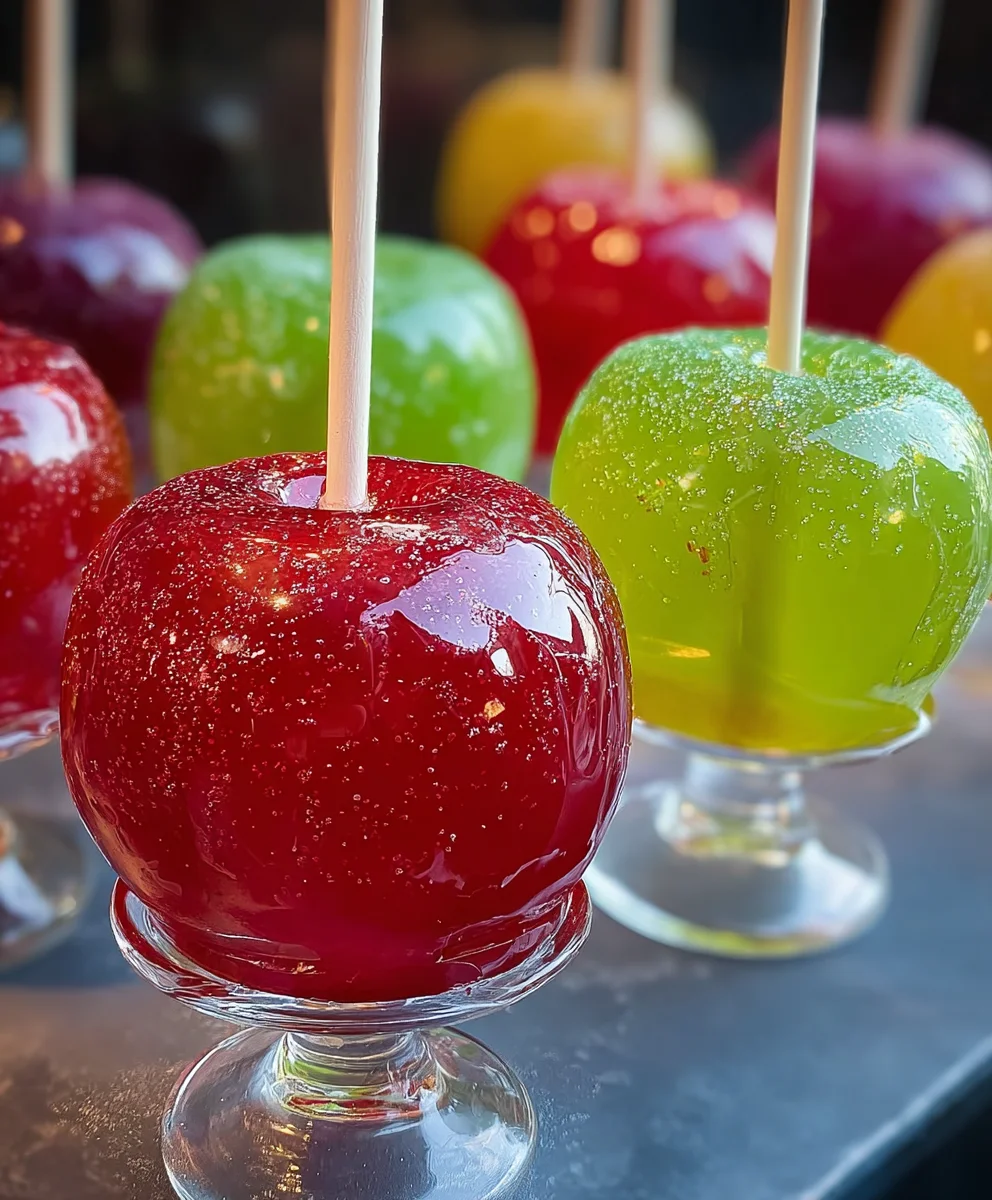
Jolly Rancher Candy Apples are more than just a nostalgic treat; they’re a vibrant explosion of sweet and tart that transports us back to carefree autumn days and bustling fairgrounds. The satisfying crunch of the apple giving way to the hard, crystalline shell is an experience in itself. What truly sets these Jolly Rancher Candy Apples apart from your average caramel apple is the knon-alcoholic aleidoscope of fruity flavors and dazzling colors that Jolly Ranchers bring to the table. Instead of a single, predictable sweetness, you get a delightful medley – from the zesty tang of green apple to the bold punch of watermelon and the classic cherry, each bite is an adventure. Imagin extracte a glossy, jewel-toned coating encasing a crisp, juicy apple. This recipe elevates a simple apple into a visually stunning and irresistibly delicious confection that’s perfect for parties, holidays, or just a fun weekend project. Get ready to create a batch of these iconic Jolly Rancher Candy Apples that will have everyone asking for the recipe!
Ingredients:
- 6 medium apples (choose firm varieties like Granny Smith for tartness, Honeycrisp for sweetness, or Fuji for a balanced flavor)
- 2-3 bags of Jolly Rancher hard candies (you can mix and match assorted flavors for a vibrant, multi-colored coating, or stick to a single color for a more uniform look. Approximately 10-12 oz per bag is a good estimate)
- 1-2 tablespoons water (this helps the candies melt smoothly and prevents scorching)
- Wooden skewers or popsicle sticks (sturdy ones are best to support the weight of the candy-coated apples)
- Colorful sprinkles (for added decoration and texture)
- Edible glitter (optional, but adds a touch of sparkle and festivity)
- Melted chocolate for drizzling (white or dark chocolate works well for a decorative contrast)
Preparing the Apples and Setting Up
Washing and Drying the Apples
The first crucial step for achieving perfectly coated Jolly Rancher Candy Apples is to prepare your apples. Begin extract by thoroughly washing all six medium apples under cool running water. This removes any residual wax or dirt. After washing, it is absolutely vital to dry them completely. Moisture is the enemy of candy coating, as it will prevent the melted Jolly Ranchers from adhering properly and can lead to a sticky, less-than-ideal finish. Use clean kitchen towels or paper towels to pat each apple dry, paying special attention to the stem area.
Inserting the Skewers
Once your apples are bone dry, it’s time to insert the skewers. Take a wooden skewer or popsicle stick and firmly push it into the stem end of each apple. You want to insert it deep enough so that it feels secure and won’t wiggle loose when you dip the apple into the hot candy mixture. Aim to push the skewer about two-thirds of the way into the apple. If you’re using thicker skewers, you might find it helpful to gently twist them as you push to help them penetrate the firm apple flesh.
Preparing the Candy Mixture
Now comes the fun part – preparing the Jolly Rancher coating. You’ll need a medium-sized, heavy-bottomed saucepan for this. Open your bags of Jolly Rancher candies. For a more even melt and to prevent burning, it’s best to break or roughly chop the candies into smaller pieces. You can do this by placing them in a sturdy plastic bag and gently tapping them with a rolling pin or the flat side of a heavy knife. Discard any wrappers. Pour the broken-up Jolly Ranchers into your saucepan. Add 1 to 2 tablespoons of water to the candies. This small amount of water is essential; it helps the candies to melt evenly and smoothly, preventing them from burning or becoming too stiff.
Melting the Jolly Ranchers and Coating
Melting the Jolly Ranchers
Place the saucepan with the Jolly Ranchers and water over medium-low heat. It’s important to use low to medium-low heat to avoid scorching the candy. Stir constantly with a heat-resistant spatula or wooden spoon as the cagin extractes begin to melt. Be patient; this process can take several minutes. You’re looking for a smooth, glossy, and completely melted candy mixture. Once all the candies have melted and the mixture is homogenous, continue to stir for another minute or two to ensure it’s uniformly hot and pourable. The consistency should be like thick syrup. If it seems too thick, you can add another teaspoon of water and stir well.
Dipping the Apples
With your candy mixture perfectly melted and hot, it’s time to coat your apples. Working one apple at a time, hold the skewer firmly and carefully dip an apple into the melted Jolly Rancher coating. Tilt the pan slightly to make dipping easier. Rotate the apple to ensure it’s evenly coated from top to bottom. You might want to dip it about two-thirds to three-quarters of the way up the apple, leaving a small area uncoated near the stem for easier handling. Lift the apple out of the candy mixture and let any excess drip back into the pan. You can gently swirl the apple to encourage an even coating. Don’t worry if you have a few drips; they add character.
Decorating and Finishing
Adding Decorations
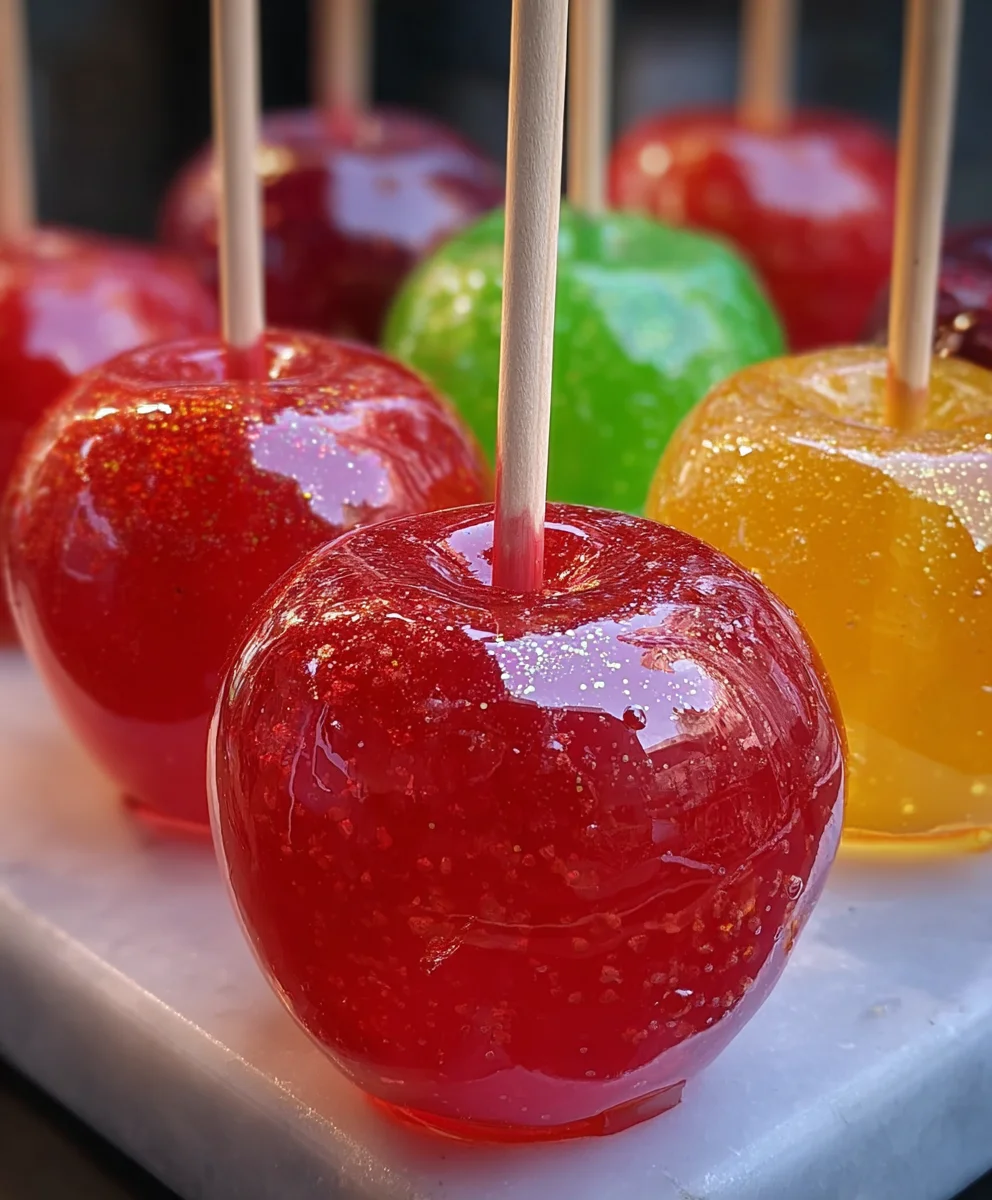
As soon as you’ve coated an apple, and before the candy coating hardens completely, it’s time to add your festive decorations. Immediately sprinkle colorful sprinkles and edible glitter (if using) over the still-wet candy. You can roll the apple lightly in a shallow dish of sprinkles or carefully spoon them onto the sides. The melted Jolly Rancher coating will act as the “glue” to hold these decorations in place. Work quickly, as the candy hardens relatively fast.
Drizzling with Chocolate
For an extra touch of elegance and flavor, prepare your melted chocolate. You can melt white or dark chocolate chips in a microwave-safe bowl in short intervals, stirring between each, or use a double boiler. Once melted and smooth, transfer the melted chocolate to a piping bag with a fine tip, or a Ziploc bag with a small corner snipped off. Drizzle the melted chocolate decoratively over the candy-coated apples. You can create zig-zags, stripes, or more intricate patterns. This adds a lovely visual contrast and another layer of deliciousness.
Setting and Chilling
After decorating, carefully place each candy-coated apple upright on a baking sheet lined with parchment paper or wax paper. Allow the apples to sit at room temperature for about 30-60 minutes, or until the candy coating is completely firm and hardened. For a faster set, you can place the baking sheet in the refrigerator for about 15-20 minutes. Ensure they are fully set before handling or storing to prevent smudges or damage to the beautiful candy coating.
Conclusion:
There you have it – your guide to creating stunning and delicious Jolly Rancher Candy Apples! We hope you’ve enjoyed this sweet adventure and are excited to try making them yourself. The vibrant colors and classic sweet-tart flavor of Jolly Ranchers combined with crisp apples make for a truly delightful treat that’s perfect for parties, holidays, or just a fun afternoon baking project. Don’t be intimidated by the candy coating; with a little patience, you’ll achieve that perfect, shatteringly crisp shell.
For serving, these Jolly Rancher Candy Apples are a showstopper on their own. You can also drizzle them with extra melted white or dark chocolate for an added layer of indulgence, or sprinkle them with edible glitter for extra sparkle. For variations, feel free to experiment with different Jolly Rancher flavors to create a rainbow of colors and taste profiles. You could also try adding a pinch of sea salt to the melted candy for a sweet and salty contrast.
We encourage you to get creative and have fun with this recipe. The joy of making homemade candy apples is in the process and the delicious reward at the end. So grab your apples and your favorite Jolly Ranchers, and let’s get cooking!
Frequently Asked Questions:
Q1: How do I prevent the candy coating from becoming sticky or cloudy?
To achieve a perfectly crisp and clear candy coating for your Jolly Rancher Candy Apples, it’s crucial to reach the correct temperature (around 300-310°F or 150-155°C) and avoid over-stirring once the sugar has melted. Humidity can also be a factor; it’s best to make these on a drier day if possible. Ensure your apples are completely dry before dipping.
Q2: Can I make Jolly Rancher Candy Apples ahead of time?
Yes, you can make Jolly Rancher Candy Apples a day or two in advance. Store them individually wrapped in plastic wrap and keep them in a cool, dry place. Avoid refrigerating them, as this can cause condensation and make the candy coating sticky.
Jolly Rancher Candy Apples Easy Recipe – Bright Fruity Fun
An easy and fun recipe for making vibrant Jolly Rancher candy apples with colorful decorations.
Ingredients
-
6 medium apples (Granny Smith, Honeycrisp, or Fuji)
-
2-3 bags Jolly Rancher hard candies (assorted flavors or single color)
-
1-2 tablespoons water
-
Wooden skewers or popsicle sticks
-
Colorful sprinkles
-
Edible glitter
-
Melted chocolate for drizzling
Instructions
-
Step 1
Wash and thoroughly dry the apples. Insert a wooden skewer firmly into the stem end of each apple, about two-thirds of the way in. -
Step 2
Break or roughly chop the Jolly Rancher candies into smaller pieces. Discard wrappers and place candies in a heavy-bottomed saucepan with 1-2 tablespoons of water. -
Step 3
Melt the candies over medium-low heat, stirring constantly until smooth, glossy, and pourable like thick syrup. Stir for an additional minute or two to ensure uniform heat. -
Step 4
Dip each apple into the melted Jolly Rancher coating, tilting the pan and rotating the apple for even coverage. Let excess candy drip back into the pan. -
Step 5
While the coating is still wet, immediately add colorful sprinkles and edible glitter. Work quickly as the candy hardens fast. -
Step 6
Drizzle melted white or dark chocolate decoratively over the candy-coated apples using a piping bag or a small ziplock bag. -
Step 7
Place the decorated apples upright on a parchment-lined baking sheet. Let them set at room temperature for 30-60 minutes, or chill in the refrigerator for 15-20 minutes until completely firm.
Important Information
Nutrition Facts (Per Serving)
It is important to consider this information as approximate and not to use it as definitive health advice.
Allergy Information
Please check ingredients for potential allergens and consult a health professional if in doubt.