No Bake Oreo Nutella Cheesecake – Easy Dessert
No Bake Oreo Nutella Cheesecake is the dessert dream you didn’t know you were having. Imagin extracte sinking your spoon into a creamy, decadent swirl of Nutella-infused cheesecake, nestled on a crunchy Oreo crust, all without ever turning on your oven. It’s pure magic, and trust me, it’s incredibly easy to make. This isn’t just any cheesecake; it’s a symphony of textures and flavors that will have everyone beggin extractg for the recipe. The irresistible combination of rich, chocolatey Nutella and the classic cookie crunch of Oreos creates a flavor profile that is universally adored. It’s the perfect treat for those hot summer days when you want something utterly delicious but don’t want to heat up your kitchen, or frankly, any day you crave a little indulgence. Get ready to fall head over heels for this no bake wonder!
No Bake Oreo Nutella Cheesecake
Get ready to indulge in a truly decadent dessert that requires absolutely no oven time! This No Bake Oreo Nutella Cheesecake is the perfect marriage of crunchy cookie, creamy chocolate-hazelnut bliss, and rich cheesecake. It’s incredibly easy to make, making it a fantastic option for when you’re craving something special but don’t want to spend hours in the kitchen. The combination of familiar Oreo flavors with the irresistible pull of Nutella creates a symphony of tastes and textures that will have everyone asking for seconds. Whether you’re a seasoned baker or a complete begin extractner, this recipe is foolproof and guaranteed to impress. Let’s dive into creating this chocolatey dream!
Ingredients:
Creating the Dreamy Base
The foundation of any great cheesecake is its crust, and for this no-bake wonder, we’re going with a classic Oreo base. The first step is to get your Oreos nicely crushed. You can do this in a food processor for a fine, even crum extractb, or place them in a sturdy zip-top bag and bash them with a rolling pin – a fun, stress-relieving activity! Once you have your 200g of crushed Oreos, we’ll combine them with the melted butter. In a medium bowl, pour in your crushed Oreos. Then, drizzle in the melted butter and stir everything together until all the crum extractbs are moistened. The mixture should resemble wet sand.
Next, we’ll press this delicious mixture into the base of our springform pan. I recommend using a 20-23cm (8-9 inch) springform pan for this recipe. This type of pan is ideal as it allows you to easily remove the cheesecake without damagin extractg its beautiful form. Pour the Oreo and butter mixture into the pan and use the bottom of a glass or a flat-bottomed measuring cup to firmly press it down into an even layer across the bottom. You want a solid, compact base that won’t crum extractble when you slice into the cheesecake. For an extra touch of flair and a delightful visual, sprinkle the 5 crushed Oreos (with no filling) over this base. This adds a subtle textural contrast and a bit more Oreo goodness right from the start. Pop the pan into the refrigerator while you prepare the filling, allowing the base to firm up.
Crafting the Luscious Cheesecake Filling
Now, for the star of the show: the creamy, dreamy cheesecake filling! In a large mixing bowl, add your softened cream cheese. It’s crucial that the cream cheese is at room temperature; this ensures it will whip up smoothly and you won’t have any lumps. Beat the cream cheese with an electric mixer (handheld or stand mixer) until it’s completely smooth and creamy. This usually takes about 2-3 minutes. Next, add the 200g of Nutella to the cream cheese. Gradually increase the mixer speed and continue to beat until the Nutella is fully incorporated and the mixture is a uniform, beautiful chocolatey color. Scrape down the sides of the bowl a couple of times to make sure everything is well combined.
In a separate, clean bowl, pour in the chilled heavy whipping cream. Add the 50g of granulated sugar to the cream. Whip the cream and sugar together on medium-high speed until stiff peaks form. This means when you lift the whisk or beaters, the cream will stand up straight without drooping. Be careful not to over-whip, or you’ll end up with butter! Gently fold the whipped cream into the Nutella and cream cheese mixture. Use a spatula and a gentle, folding motion to incorporate the air from the whipped cream without deflating it. You want to maintain that light and airy texture. Finally, gently fold in the 100g of chopped Oreos. These will add delightful little pockets of cookie crunch throughout the creamy filling.
Assembling and Chilling for Perfection
Once your filling is beautifully combined and studded with those delicious Oreo pieces, it’s time to assemble the cheesecake. Take your chilled springform pan with the prepared base out of the refrigerator. Spoon the luscious cheesecake filling evenly over the Oreo base, spreading it out with your spatula to create a smooth, even surface. You want the top to look as inviting as the rest of the cheesecake.
Now comes the hardest part: waiting! Cover the springform pan loosely with plastic wrap. You can also opt to cover it more tightly if you’re worried about it picking up any fridge odors, but be careful not to press the plastic wrap onto the surface of the cheesecake. Place the cheesecake in the refrigerator and let it chill for a minimum of 4-6 hours, or preferably overnight. This chilling time is essential for the cheesecake to set properly and develop its firm, creamy texture. The longer it chills, the firmer and easier it will be to slice.
The Glorious Nutella Drizzle and Final Touches
Just before you’re ready to serve your masterpiece, it’s time for the show-stopping drizzle. Gently warm the 100g of Nutella in a small saucepan over low heat or in the microwave in 15-second intervals, stirring in between, until it’s a pourable consistency. Be careful not to overheat it; we just want it slightly runny, not hot. Remove the sides of the springform pan from the cheesecake. This is where the springform pan really shines!
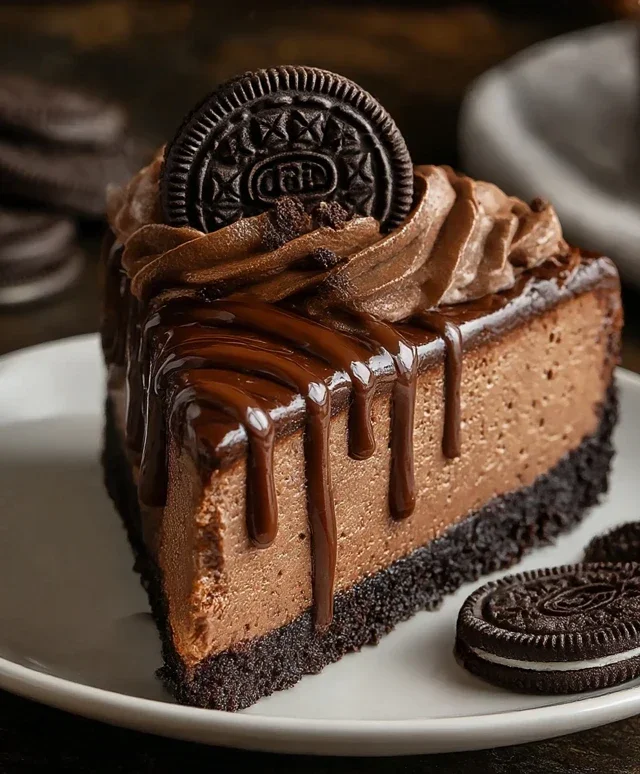
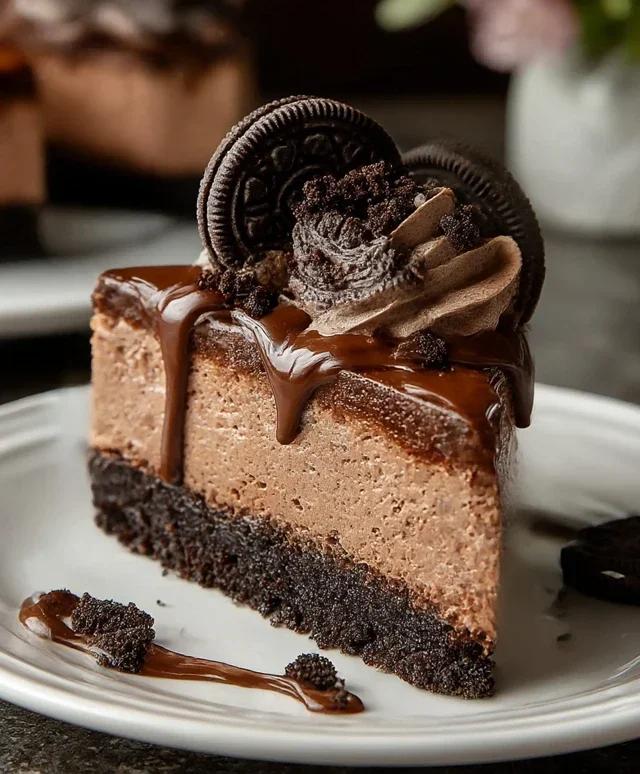
Now, take your warmed Nutella and drizzle it artistically over the top of the cheesecake. You can use a spoon to create zig-zags, swirls, or even just pour it freely. The warm Nutella will create a beautiful glossy finish. To complete the decoration, artfully arrange the 6 whole Oreos around the top edge or in the center of your stunning creation. This adds a final touch of elegance and lets everyone know what deliciousness awaits them inside! Slice and enjoy this incredibly satisfying no-bake treat.
Conclusion:
And there you have it! This No Bake Oreo Nutella Cheesecake is an absolute dream for anyone who loves chocolate, cookies, and the irresistible combination of Nutella and cheesecake. It’s incredibly easy to whip up, requiring no oven time, making it the perfect dessert for busy weeknights or spontaneous gatherings. The creamy, rich filling, studded with chunks of crunchy Oreo cookies and swirled with luscious Nutella, is simply divine. It’s the ultimate treat that guarantees smiles all around and will have everyone asking for the recipe!
I love serving this decadent dessert chilled, either in individual ramekins for a more elegant presentation or as a whole cheesecake, sliced and enjoyed with a dollop of whipped cream or a few extra Oreo crum extractbles. For variations, don’t be afraid to experiment! You could add a layer of chopped hazelnuts to the crust for extra crunch, or swirl in some raspberry coulis for a fruity contrast. Feel free to use other chocolate cookies if Oreos aren’t your favorite. I truly hope you give this fantastic No Bake Oreo Nutella Cheesecake a try – I promise you won’t be disappointed!
Frequently Asked Questions:
Can I make this cheesecake ahead of time?
Absolutely! This cheesecake is best made at least 4-6 hours in advance, or even the day before. This allows the flavors to meld beautifully and the cheesecake to set properly, ensuring a perfect texture.
How long will the cheesecake last in the refrigerator?
Stored in an airtight container in the refrigerator, this No Bake Oreo Nutella Cheesecake will typically stay fresh and delicious for 3-4 days. The crust might soften slightly over time, but it will still be incredibly tasty.
What if I don’t have a food processor for the crust?
No worries! You can still make a fantastic crust by placing the Oreos in a sturdy zip-top bag and crushing them with a rolling pin until fine crum extractbs form. It might take a little more elbow grease, but the result will be just as delicious!
No Bake Oreo Nutella Cheesecake
A decadent no-bake cheesecake featuring a crushed Oreo base, creamy Nutella and cream cheese filling, and a delightful Oreo topping, perfect for any occasion.
Ingredients
-
200g crushed Oreos
-
50g melted butter
-
500g cream cheese, softened
-
200g Nutella
-
200g heavy whipping cream (35%)
-
50g sugar
-
100g chopped Oreos
-
100g Nutella
-
100g Nutella, warmed for drizzling
-
5 crushed Oreos (no filling)
-
6 whole Oreos for garnish
Instructions
-
Step 1
For the crust: Combine crushed Oreos and melted butter. Press firmly into the base of a springform pan. -
Step 2
In a large bowl, beat softened cream cheese until smooth. Gradually beat in 200g Nutella and sugar until well combined. -
Step 3
In a separate bowl, whip heavy cream until stiff peaks form. Gently fold the whipped cream into the cream cheese and Nutella mixture. -
Step 4
Spread the cheesecake filling evenly over the Oreo crust. Sprinkle 100g chopped Oreos and 100g Nutella over the top. -
Step 5
Chill the cheesecake in the refrigerator for at least 4-6 hours, or until firm. -
Step 6
Before serving, drizzle with warmed Nutella and garnish with crushed Oreos (no filling) and whole Oreos.
Important Information
Nutrition Facts (Per Serving)
It is important to consider this information as approximate and not to use it as definitive health advice.
Allergy Information
Please check ingredients for potential allergens and consult a health professional if in doubt.