Mini Red Velvet Oreo Cheesecakes-Decadent Dessert
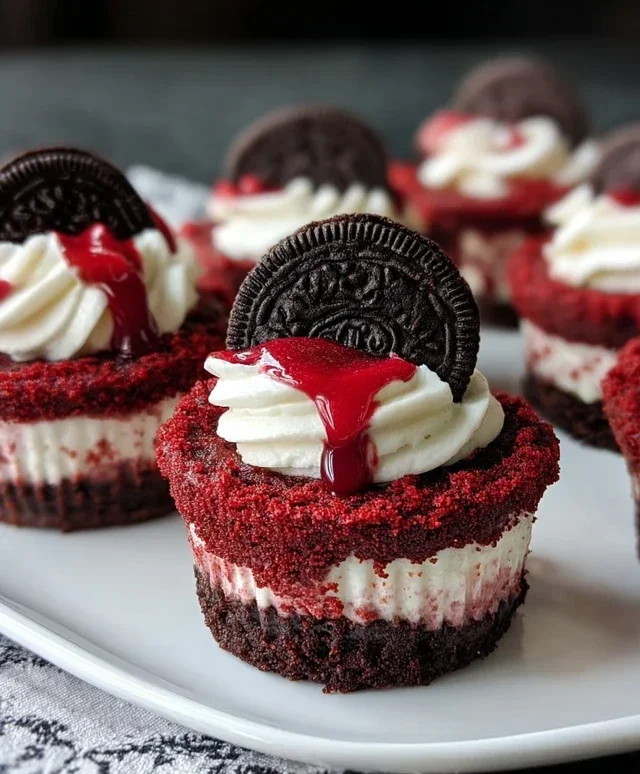
Mini Red Velvet Oreo Cheesecakes are about to become your new obsession! If you’re anything like me, the thought of a decadent, bite-sized dessert that combines two beloved classics is enough to make your taste buds tingle. And let me tell you, these Mini Red Velvet Oreo Cheesecakes deliver on every single promise. We all adore the rich, slightly tangy flavor of red velvet cake, and the iconic crunch and creamy filling of an Oreo cookie is pure nostalgia. When you fuse them together into individual, perfectly portioned cheesecakes, you create something truly magical. It’s the perfect balance of deep chocolate notes, vibrant red hues, and that irresistibly smooth cheesecake texture, all nestled on a dark, crum extractbly Oreo crust. Forget the fuss of a full-sized cheesecake; these mini delights are easier to make, easier to serve, and oh-so-satisfying.
Mini Red Velvet Oreo Cheesecakes
Get ready to impress with these absolutely divine Mini Red Velvet Oreo Cheesecakes! These little bundles of joy combine the classic, rich flavor of red velvet cake with the creamy indulgence of cheesecake, all nestled atop a crunchy Oreo crust. They’re perfect for parties, special occasions, or just because you deserve a treat. The vibrant red hue makes them a showstopper, and the individual portions make them incredibly easy to serve. Plus, they’re surprisingly straightforward to make!
Ingredients:
Oreo Crust Preparation
The base of our delightful cheesecakes starts with a simple yet incredibly effective Oreo crust. This provides a wonderful textural contrast to the creamy filling and infuses a subtle chocolatey note.
1. Begin extract by preparing your Oreo cookies for the crust. You’ll need 12 whole Oreo cookies. Place them in a food processor and pulse until they are finely ground into crum extractbs. If you don’t have a food processor, you can place the cookies in a zip-top bag, seal it tightly, and then crush them with a rolling pin or the bottom of a heavy pan. The goal is to have a fine, sand-like consistency.
2. In a medium bowl, combine the finely ground Oreo crum extractbs with the 3 tablespoons of all-purpose flour, 1/2 cup of cocoa powder, and 1/2 cup of granulated sugar. Add a pinch of salt to enhance all the flavors. Whisk these dry ingredients together until they are well combined.
3. Pour in the 1/4 cup of melted unsalted butter. Stir everything together with a fork or spoon until the mixture resembles wet sand and holds together when squeezed. This is your crust mixture.
4. Now, it’s time to assemble your mini cheesecakes. You’ll need a muffin tin, preferably lined with paper liners or greased generously. If you have silicone muffin liners, those work wonderfully for easy removal. Divide the Oreo crust mixture evenly among the 12 muffin cups, pressing it down firmly into the bottom of each cup to form a compact crust. You can use the back of a small spoon or the bottom of a shot glass to help pack it down tightly. Place the muffin tin in the refrigerator while you prepare the cheesecake filling. This chilling step helps the crust set and prevents it from crum extractbling when you add the filling.
Red Velvet Cheesecake Filling
This is where the magic truly happens! We’re creating a luscious, creamy filling with that signature red velvet flavor.
5. In a large bowl, beat the 8 oz of room temperature cream cheese until it is completely smooth and free of any lumps. It’s crucial that your cream cheese is at room temperature, as this will ensure a silky-smooth filling. If it’s too cold, you’ll end up with a lumpy texture.
6. Add the 1/4 cup of sour cream, 1/4 cup of granulated sugar, 1 tablespoon of cocoa powder, and 1/2 teaspoon of vanilla extract to the cream cheese. Beat these ingredients together until just combined. Be careful not to overmix at this stage, as overmixing can introduce too much air, which can cause cracks in your cheesecakes.
7. Now, it’s time for the star of the show: the red color! Add a generous amount of red gel food coloring to the mixture. Gel food coloring is preferred over liquid because it’s more concentrated and won’t thin out your filling. Start with a few drops and mix until you achieve your desired vibrant red hue. You can always add more if needed, but it’s harder to remove it if you add too much at once.
8. Scrape down the sides of the bowl to ensure everything is incorporated. Then, add the 1 egg, at room temperature, to the mixture. Beat on low speed until just incorporated. Again, avoid overmixing. The filling should be smooth, creamy, and a beautiful, rich red.
Baking and Chilling
The final steps involve baking and allowing these beauties to set properly. Patience is key here for the best results!
9. Preheat your oven to 325°F (160°C). Remove the chilled muffin tin from the refrigerator. Carefully spoon the red velvet cheesecake filling evenly over the Oreo crusts in each muffin cup, filling them about two-thirds to three-quarters full.
10. Bake for 18-22 minutes, or until the edges of the cheesecakes are set and the centers are still slightly jiggly. They will continue to set as they cool.
11. Once baked, remove the muffin tin from the oven and let the cheesecakes cool in the tin for about 10-15 minutes. Then, carefully lift the cheesecakes out of the muffin tin (if using liners) or gently loosen them from the tin. Place them on a wire rack to cool completely to room temperature. This is a crucial step; do not refrigerate them while they are still warm.
12. After they have cooled to room temperature, cover the cheesecakes loosely with plastic wrap and refrigerate for at least 4 hours, or preferably overnight. This chilling period is essential for the cheesecakes to firm up properly and develop their full, rich flavor. The longer they chill, the better they will taste and the firmer they will become.
Enjoy your stunning and delicious Mini Red Velvet Oreo Cheesecakes! They are best served chilled.
Conclusion:
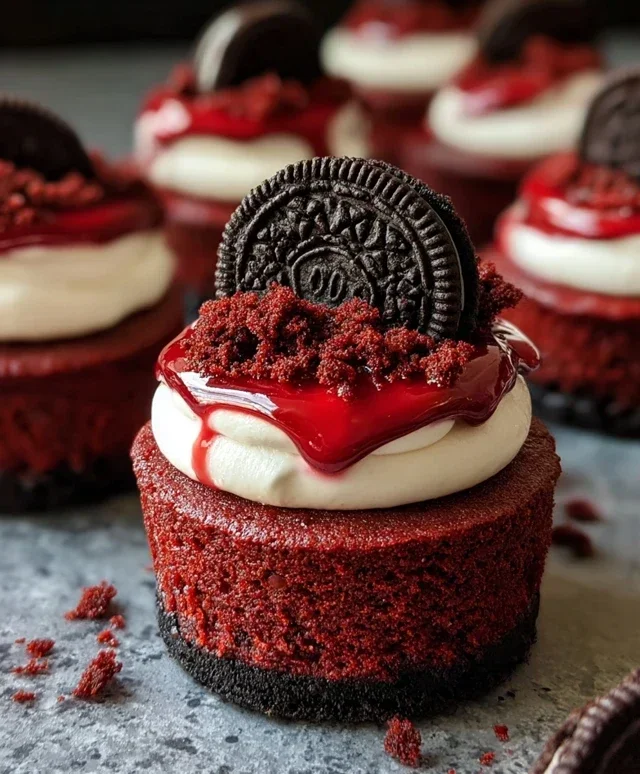
And there you have it – your very own batch of delightful Mini Red Velvet Oreo Cheesecakes! These little beauties are an absolute triumph, offering a perfect fusion of classic red velvet richness and the irresistible crunch of Oreo cookies, all nestled in a creamy cheesecake filling. They’re incredibly impressive yet surprisingly approachable to make, making them ideal for any occasion, from a casual weeknight treat to a show-stopping dessert for your next gathering. The individual portion sizes make them wonderfully convenient for serving and they look absolutely stunning when presented.
I highly encourage you to give this recipe a try. You won’t be disappointed by the explosion of flavors and textures. Feel free to get creative with variations! Perhaps a swirl of cream cheese frosting on top, a sprinkle of chocolate shavings, or even a raspberry coulis for a tart contrast. The possibilities are endless when you’re working with such a winning combination.
Frequently Asked Questions:
Q: Can I make these Mini Red Velvet Oreo Cheesecakes ahead of time?
Absolutely! These cheesecakes are fantastic for making ahead. You can prepare them up to 24 hours in advance and store them in the refrigerator. Just ensure they are covered tightly to prevent them from drying out. They often taste even better the next day as the flavors meld together.
Q: What is the best way to serve these mini cheesecakes?
They are wonderful served chilled directly from the refrigerator. For an extra special touch, consider topping them with a dollop of whipped cream, a fresh berry, or a small drizzle of chocolate sauce. Their individual size makes them perfect for dessert buffets or as elegant single-serve treats.
Mini Red Velvet Oreo Cheesecakes
Decadent mini cheesecakes with a rich red velvet flavor, layered with crushed Oreos and a creamy cream cheese filling. Perfect for any celebration.
Ingredients
-
12 Oreo cookies
-
1/4 cup unsalted butter, melted
-
3 tablespoons all-purpose flour
-
1/2 cup cocoa powder
-
1/2 cup granulated sugar
-
1 egg, room temperature
-
1/2 teaspoon vanilla extract
-
Pinch of salt
-
8 oz cream cheese, room temperature
-
1 egg, room temperature
-
1/4 cup sour cream, room temperature
-
1/4 cup granulated sugar
-
1 tablespoon cocoa powder
-
1/2 teaspoon vanilla extract
-
Red gel food coloring
Instructions
-
Step 1
Preheat oven to 350°F (175°C). Line a 12-cup muffin tin with cupcake liners. -
Step 2
Crush the Oreo cookies into fine crumbs. In a bowl, combine the Oreo crumbs with the melted butter and press evenly into the bottom of each cupcake liner to form the crust. -
Step 3
In a medium bowl, whisk together the flour, 1/2 cup cocoa powder, 1/2 cup granulated sugar, 1 egg, 1/2 teaspoon vanilla extract, and a pinch of salt until smooth. This is the red velvet cake batter. -
Step 4
In a separate large bowl, beat the cream cheese until smooth. Add the remaining egg, sour cream, 1/4 cup granulated sugar, 1 tablespoon cocoa powder, and 1/2 teaspoon vanilla extract. Beat until well combined. Stir in the red gel food coloring until desired color is achieved. -
Step 5
Spoon about 1 tablespoon of the red velvet cake batter over the Oreo crust in each muffin cup. Then, top each with about 2 tablespoons of the cream cheese mixture. -
Step 6
Bake for 18-22 minutes, or until the edges are set and the centers are just slightly jiggly. Let cool in the muffin tin for 10 minutes before transferring to a wire rack to cool completely. -
Step 7
Chill the cheesecakes in the refrigerator for at least 2 hours before serving.
Important Information
Nutrition Facts (Per Serving)
It is important to consider this information as approximate and not to use it as definitive health advice.
Allergy Information
Please check ingredients for potential allergens and consult a health professional if in doubt.