Easy Keto Buns-Quick Delicious Low Carb Bread
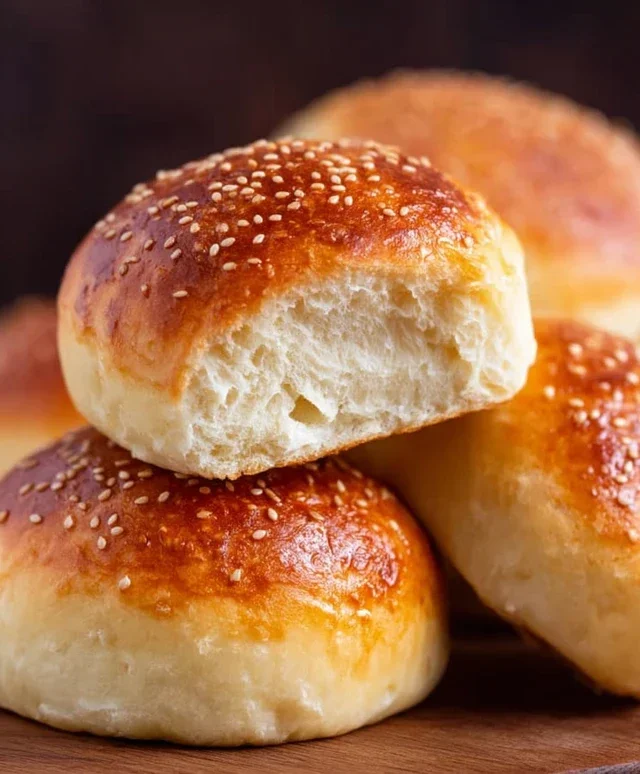
Easy Keto Buns are the holy grail for anyone following a ketogenic lifestyle, and I’m thrilled to share my go-to recipe with you! Are you tired of feeling deprived of delicious bread on your keto journey? Do you dream of sinking your teeth into a soft, satisfying bun that won’t derail your progress? Well, dream no more! These easy keto buns are incredibly simple to whip up, requiring minimal ingredients and even less fuss. What makes them so special? They miraculously mimic the texture and taste of traditional bread, making them perfect for your morning eggs, a hearty sandwich, or even a mini pizza base. You’ll love how versatile they are and how easily they fit into your low-carb goals without sacrificing flavor or enjoyment. Get ready to elevate your keto meals with these amazing buns!
Easy Keto Buns
Welcome to the game-changer for your low-carb lifestyle! If you’ve been missing the simple joy of a soft, satisfying bun to accompany your meals, hold your horses, because these Easy Keto Buns are about to become your new best friend. Forget those dry, crum extractbly imposters; these are wonderfully tender, slightly chewy, and surprisingly versatile. They’re perfect for dipping into soups, serving alongside your favorite hearty stews, or even as the base for a mini keto sandwich. Making them is a breeze, and the ingredients are readily available, making this a recipe you’ll return to again and again. Let’s get baking!
Ingredients:
*Notes on Cheese: For the best results, I highly recommend using a low-moisture, part-skim mozzarella. Pre-shredded often contains anti-caking agents that can affect the texture, so if you have a block, shredding it yourself will give you an even better outcome. You can experiment with other cheeses like cheddar or a Monterey Jack blend, but mozzarella is generally the most neutral and yields the most classic bun texture.
Preparing Your Buns
The magic behind these keto buns lies in their simplicity and the way the cheese melts and binds everything together. Before you begin extract mixing, preheat your oven to 375°F (190°C). Line a baking sheet with parchment paper; this is crucial to prevent any sticking and makes for easy cleanup. Having your baking sheet prepared beforehand means you can get these little gems into the oven as soon as they’re formed.
Step-by-Step Instructions
1. Melt the Cheeses: In a microwave-safe bowl, combine the shredded mozzarella cheese and the cream cheese. Microwave in 30-second intervals, stirring between each interval, until both cheeses are completely melted and smooth. This usually takes about 1 to 1.5 minutes in total. You want a cohesive, gooey mixture. Be careful not to overheat, as this can make the cheese stringy and harder to work with. Once melted, let it cool slightly for about 2-3 minutes. This slight cooling will prevent the eggs from scrambling when you add them.
2. Combine Wet and Dry Ingredients: To the slightly cooled cheese mixture, add the 3 large eggs. Stir everything together thoroughly until well combined and the mixture is uniform in color. Next, add the almond flour and baking powder to the bowl. Almond flour provides a wonderful base for keto baking, giving it structure without the carbs. The baking powder is our leavening agent, ensuring these buns have a nice lift and aren’t too dense.
3. Form the Dough: Mix the ingredients until a cohesive dough forms. This dough will be quite sticky due to the melted cheese. Don’t be alarmed by this! You can use a sturdy spoon or a silicone spatula to incorporate everything initially. Once it starts to come together, you can gently knead it in the bowl a few times to ensure all the almond flour is fully incorporated. The texture will be softer than traditional bread dough, more akin to a thick batter or a very soft playdough.
4. Shape the Buns: This is where the sticky dough needs a little help. Lightly grease your hands with a bit of olive oil or a neutral cooking spray. Alternatively, you can use a cookie scoop to portion out the dough. This helps create uniform buns and minimizes direct contact with the sticky dough. Scoop out portions of dough and gently roll them into balls, about the size of a golf ball. Place the formed buns onto your prepared baking sheet, leaving a little space between each one as they will expand slightly. If the dough is proving too sticky to form nice balls, don’t worry about perfect spheres; rustic is good too!
5. Bake to Golden Perfection: Place the baking sheet in your preheated oven. Bake for 18-22 minutes, or until the buns are golden brown on top and feel firm to the touch. The exact baking time can vary depending on your oven, so keep an eye on them towards the end of the baking period. You’re looking for a beautiful golden hue, which indicates they are cooked through and have a lovely crust.
6. Cool and Enjoy: Once baked, carefully remove the buns from the oven. Let them cool on the baking sheet for about 5 minutes before transferring them to a wire rack to cool completely. While they are delicious warm, letting them cool slightly will help them firm up and prevent them from being too gooey inside. These buns are best enjoyed fresh, but leftovers can be stored in an airtight container at room temperature for a day or two, or in the refrigerator for longer storage. They can be lightly toasted before serving to revive their texture.
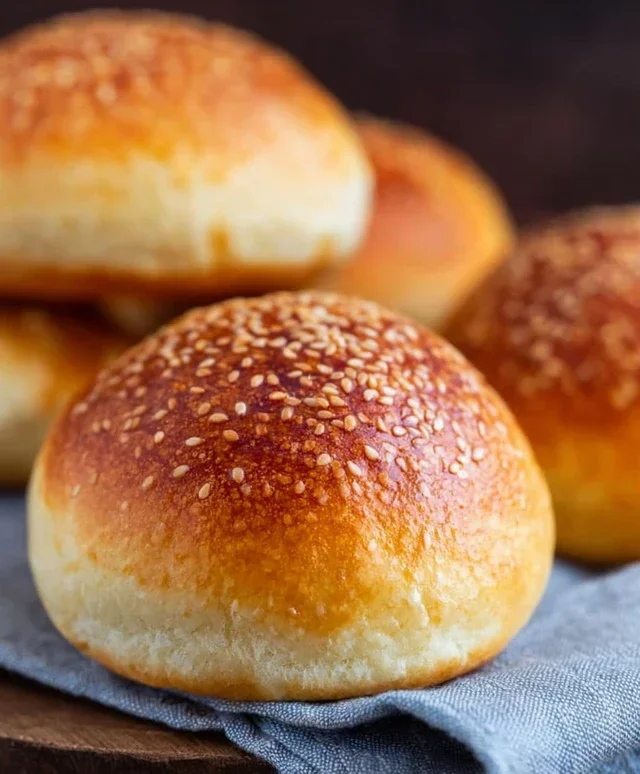
These Easy Keto Buns are a testament to how delicious and satisfying low-carb baking can be. They offer a delightful chew and a savory flavor that complements a wide range of meals. I hope you love them as much as I do!
Conclusion:
As you can see, making delicious and satisfying easy keto buns is not only achievable but incredibly rewarding. This recipe is fantastic because it delivers that comforting bread experience without the carb load, making it a game-changer for anyone following a ketogenic or low-carb lifestyle. They’re wonderfully versatile, offering a perfect base for everything from classic sandwiches to hearty burgers. The slight chegrape juicess and subtle flavor profile mean they won’t overpower your fillings, allowing your favorite ingredients to shine.
I truly encourage you to give these easy keto buns a try. The process is straightforward, and the results are incredibly delicious. Think of all the possibilities: a quick breakfast sandwich, a satisfying lunch wrap, or even a side for your favorite soup. You can easily adapt this recipe too; consider adding a sprinkle of sesame seeds on top before baking for an extra nutty crunch, or perhaps some finely chopped herbs like rosemary or chives kneaded into the dough for a more savory profile. Enjoy the freedom of having fresh, homemade keto-friendly bread whenever you crave it!
Frequently Asked Questions:
Can I store these keto buns for later?
Absolutely! Once cooled, store your easy keto buns in an airtight container at room temperature for up to 2-3 days, or in the refrigerator for up to a week. For longer storage, you can freeze them for up to 2-3 months. Simply thaw at room temperature or gently reheat them in a toaster oven or regular oven for a few minutes to enjoy them fresh.
What can I use if I don’t have almond flour?
If almond flour isn’t your preference or readily available, you can often substitute it with coconut flour. However, be aware that coconut flour is much more absorbent, so you’ll likely need to adjust the liquid ingredients. A good starting point is to use about ¼ cup of coconut flour for every cup of almond flour, and you may need to add an extra egg or a tablespoon or two of liquid. It’s always best to start with less liquid and add more as needed until you reach the right dough consistency.
Easy Keto Buns
Quick and simple keto-friendly buns perfect for sandwiches or as a side.
Ingredients
-
3 cups shredded cheese (mozzarella cheese)
-
2 ounces cream cheese
-
1 3/4 cups almond flour
-
1 tablespoon baking powder
-
3 large eggs
Instructions
-
Step 1
Preheat oven to 350°F (175°C). Line a baking sheet with parchment paper. -
Step 2
In a microwave-safe bowl, combine shredded cheese and cream cheese. Microwave in 30-second intervals, stirring in between, until fully melted and smooth. -
Step 3
Stir in the almond flour and baking powder until well combined. -
Step 4
Add the eggs one at a time, mixing until a dough forms. The dough will be sticky. -
Step 5
Divide the dough into 8 equal portions. Roll each portion into a ball and flatten slightly. Place on the prepared baking sheet. -
Step 6
Bake for 15-20 minutes, or until golden brown and firm. -
Step 7
Let cool on the baking sheet for a few minutes before transferring to a wire rack to cool completely.
Important Information
Nutrition Facts (Per Serving)
It is important to consider this information as approximate and not to use it as definitive health advice.
Allergy Information
Please check ingredients for potential allergens and consult a health professional if in doubt.