Easy Homemade Pita Bread Recipe – Make it Fresh
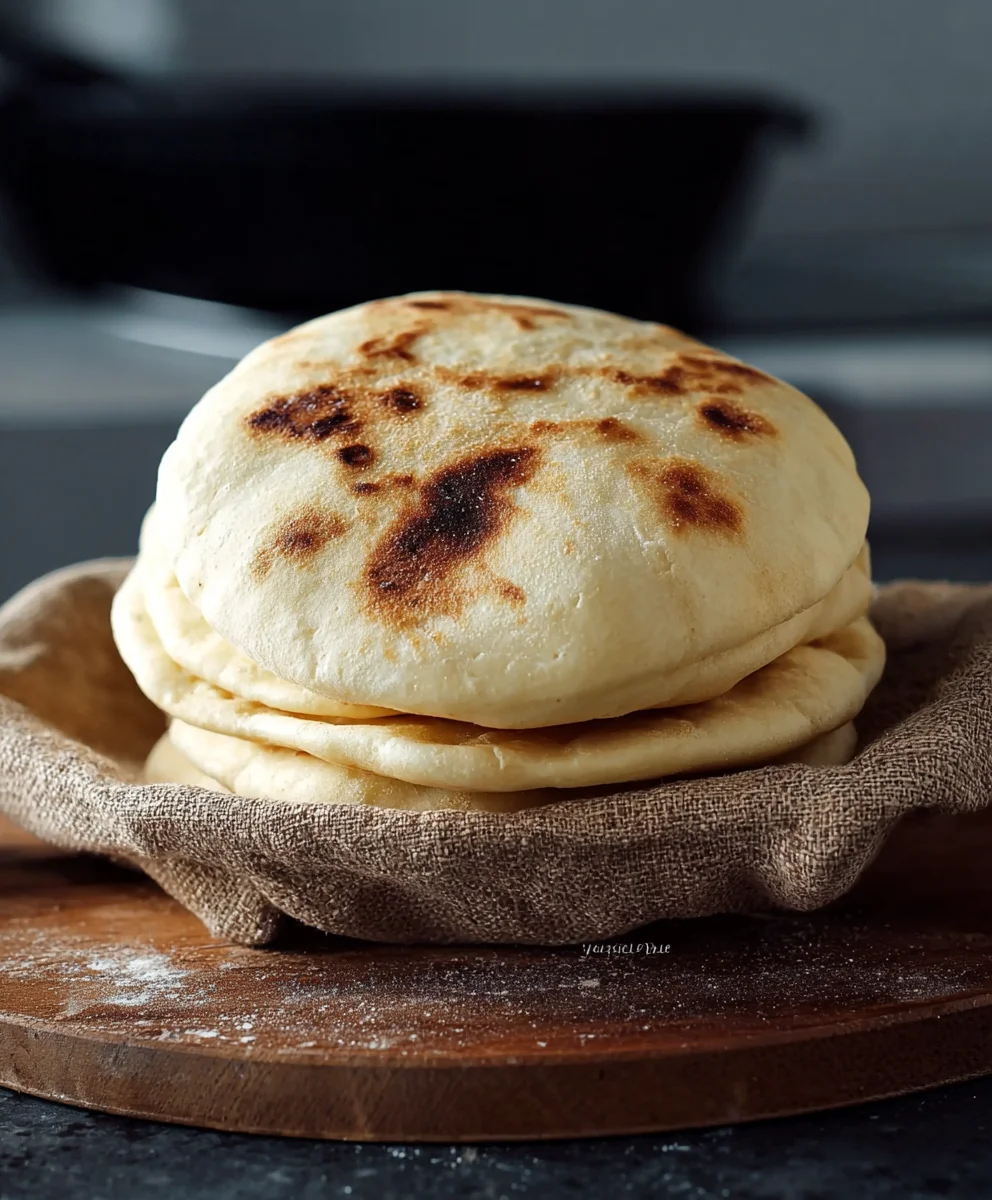
How to make Pita Bread at home is not just a recipe; it’s an invitation to unlock a world of delicious possibilities right in your own kitchen. Imagin extracte the sheer satisfaction of pulling warm, pillowy rounds of fresh pita bread from your oven, their pockets perfectly puffed and ready to embrace your favorite fillings. It’s no wonder this versatile flatbread holds such a special place in so many hearts and cuisines. The aroma alone is enough to transport you to a bustling Mediterranean market. What truly sets homemade pita bread apart is its incredible freshness and the ability to customize its texture and flavor exactly to your liking. Forget the often-stnon-alcoholic ale store-bought versions; this recipe will equip you with the knowledge to create pita bread that’s incredibly soft, slightly chewy, and boasts that signature delightful puff.
Ingredients:
- 2 cups All-purpose Flour, plus an additional 1/2 cup for dusting
- 1/2 cup Whole Wheat Flour
- 1 tablespoon Granulated Sugar
- 1 teaspoon Salt
- 1 tablespoon Olive Oil
- 2 teaspoons Active Dry Yeast (refer to notes for activation)
- 1 cup Warm Water (approximately 105-115°F or 40-46°C)
Preparing the Dough
This recipe will guide you through the rewarding process of making soft, pillowy pita bread right in your own kitchen. Forget store-bought; homemade pita offers a superior texture and flavor that is simply unmatched. We’ll be using simple, pantry-staple ingredients to create these versatile flatbreads, perfect for dipping, stuffing, or enjoying on their own.
Activating the Yeast
Before we begin extract mixing our dough, it’s crucial to ensure our yeast is alive and ready to work its magic. In a small bowl, combine the 1 cup of warm water with the 1 tablespoon of sugar. Sprinkle the 2 teaspoons of active dry yeast over the surface of the water. Give it a gentle stir and then let it sit undisturbed for about 5 to 10 minutes. You’ll know the yeast is active when it becomes foamy and bubbly on top. If you don’t see this, your yeast might be old or the water wasn’t the correct temperature, and you should start again with fresh yeast and properly warmed water. This bubbling action is a sign that the yeast is consuming the sugar and releasing carbon dioxide, which is essential for making our pita bread puff up.
Mixing and Kneading the Dough
In a large mixing bowl, combine the 2 cups of all-purpose flour and the 1/2 cup of whole wheat flour. Add the 1 teaspoon of salt and give it a quick whisk to distribute everything evenly. Now, pour in the activated yeast mixture, along with the 1 tablespoon of olive oil. Using a sturdy spoon or a spagin extracta, begin to mix the ingredients together until a shaggy dough forms. It will look a bit messy and uneven at this stage, and that’s perfectly normal. Once it starts to come together, turn the dough out onto a lightly floured surface – this is where your extra 1/2 cup of all-purpose flour comes in handygin extractr dusting. Begin to knead the dough. Push the dough away from you with the heels of your hands, then fold it back over on itself. Rotate the dough and repeat this motion. Continue kneading for about 8 to 10 minutes. You’re looking for a dough that is smooth, elastic, and no longer sticky. If it’s too sticky, add a little more flour, a tablespoon at a time, but be careful not to add too much, as this can make the pita tough. The dough should spring back slowly when you gently poke it with your finger.
First Rise (Proofing)
Once your dough has been thoroughly kneaded and has reached that smooth, elastic consistency, it’s time for its first rise. Lightly grease the mixing bowl you used earlier with a little bit of olive oil. Place the kneaded dough ball into the greased bowl, turning it to coat all sides with the oil. This prevents a dry skin from forming on the dough as it rises. Cover the bowl tightly with plastic wrap or a clean kitchen towel. Place the bowl in a warm, draft-free place in your kitchen. This could be a slightly warm oven (turned off, of course!) or simply on your countertop. Let the dough rise for about 1 to 1.5 hours, or until it has doubled in size. You’ll notice it becoming significantly puffier and lighter in texture. The time it takes can vary depending on the temperature of your kitchen, so keep an eye on it rather than strictly adhering to the clock.
Shaping and Second Rise
When your dough has doubled in size, gently punch it down to release the air that has accumulated during the first rise. Turn the dough out onto a lightly floured surface once again. Divide the dough into 8 equal portions. To do this, you can gently flatten the dough into a rough disc and then cut it into quarters, and then cut each quarter in half. Roll each portion into a smooth ball. Cover these dough balls loosely with a clean kitchen towel and let them rest for another 10 to 15 minutes. This short rest allows the gluten in the dough to relax, making it easier to rgin extract out without it springing back.
Rolling and Cooking the Pita
Now for the exciting part – turning these dough balls into beautiful pita bread! Take one of the rested dough balls and place it on your lightly floured work surface. Using a rolling pin, gently roll out the dough into a circle that is about 6 to 7 inches in diameter and approximately 1/4 inch thick. Try to keep the thickness as even as possible for uniform cooking. Don’t worry if your circles aren’t perfectly round; rustic is charming! As you roll out each pita, place it on a piece of parchment paper or a clean kitchen towel to prevent sticking, and cover them lightly while you work on the others. Meanwhile, preheat your oven to 450°F (230°C) with a baking sheet or pizza stone placed inside. Allowing the baking surface to get very hot is crucial for achieving that signature puff in the pita. Once your oven and baking surface are thoroughly heated, carefully place 1 to 2 pita breads directly onto the hot baking sheet or stone. Bake for 2 to 4 minutes per side, or until the pita has puffed up significantly and is golden brown in spots. You might see it puff up like a balloon! Once cooked, immediately remove the pita from the oven and wrap it in a clean kitchen towel. This helps to keep them soft and pliable as they cool. Repeat this process with the remaining dough balls, making sure to let the oven and baking surface reheat properly between batches if necessary.

Conclusion:
You’ve now learned how to make Pita Bread at home! This recipe is surprisingly straightforward, allowing you to enjoy fresh, fluffy, and perfectly pocketed pita bread whenever the craving strikes. The process is rewarding, and the aroma of warm bread filling your kitchen is truly unbeatable. Don’t be intimidated by yeast; follow the steps carefully, and you’ll be a pita-making pro in no time. We encourage you to experiment with this recipe – the foundation is solid, and your creativity can take it from there!
Serve your homemade pita bread warm, straight from the oven, alongside your favorite Mediterranean dips like hummus or baba ghanoush. They’re also fantastic for stuffing with grilled meats, falafel, or fresh vegetables for a delightful sandwich. Consider using them as a base for mini pizzas or as dippers for hearty stews.
For variations, try incorporating a teaspoon of dried herbs like oregano or za’atar into the dough for added flavor. You could also experiment with different flours, like a small percentage of whole wheat flour, for a nuttier taste, though this might slightly alter the texture. Remember, practice makes perfect, so embrace any little imperfections in your first batch – they’ll still taste delicious!
Frequently Asked Questions about How to make Pita Bread at home:
Why didn’t my pita bread form pockets?
The most common reason for pita bread not puffing is insufficient heat. Ensure your oven or griddle is preheated to its highest setting (around 450-500°F or 230-260°C). The dough also needs to be rolled to an even thickness and should be relatively thin. If the dough is too thick or uneven, the steam won’t be able to escape uniformly to create the pocket. Also, be sure not to prick the dough with a fork!
How do I store leftover pita bread?
Store cooled pita bread in an airtight container or a resealable plastic bag at room temperature for up to 2 days. For longer storage, wrap them tightly and freeze them for up to 2-3 months. To reheat, lightly toast them in a dry skillet, in the oven, or in a toaster oven until warm and pliable.
Easy Homemade Pita Bread Recipe
Make soft, pillowy pita bread from scratch with simple pantry ingredients. Perfect for dipping, stuffing, or enjoying on its own.
Ingredients
-
2 cups All-purpose Flour, plus 1/2 cup for dusting
-
1/2 cup Whole Wheat Flour
-
1 tablespoon Granulated Sugar
-
1 teaspoon Salt
-
1 tablespoon Olive Oil
-
2 teaspoons Active Dry Yeast
-
1 cup Warm Water
Instructions
-
Step 1
Activate the yeast by combining 1 cup warm water with 1 tablespoon sugar and 2 teaspoons active dry yeast. Let sit for 5-10 minutes until foamy. -
Step 2
In a large bowl, combine 2 cups all-purpose flour, 1/2 cup whole wheat flour, and 1 teaspoon salt. Pour in the activated yeast mixture and 1 tablespoon olive oil. Mix until a shaggy dough forms. -
Step 3
Turn the dough onto a lightly floured surface and knead for 8-10 minutes until smooth and elastic. Add more flour a tablespoon at a time if too sticky. -
Step 4
Place the dough in a lightly oiled bowl, cover, and let rise in a warm place for 1-1.5 hours, or until doubled in size. -
Step 5
Punch down the dough, divide into 8 equal portions, and roll into smooth balls. Let rest, covered, for 10-15 minutes. -
Step 6
Preheat oven to 450°F (230°C) with a baking sheet or pizza stone inside. Roll each dough ball into a 6-7 inch circle, about 1/4 inch thick. -
Step 7
Place 1-2 pitas on the hot baking surface and bake for 2-4 minutes per side, until puffed and golden brown. Wrap in a towel as they cool.
Important Information
Nutrition Facts (Per Serving)
It is important to consider this information as approximate and not to use it as definitive health advice.
Allergy Information
Please check ingredients for potential allergens and consult a health professional if in doubt.