Jolly Rancher Apples- Sweet & Chewy Candy Apple Recipe
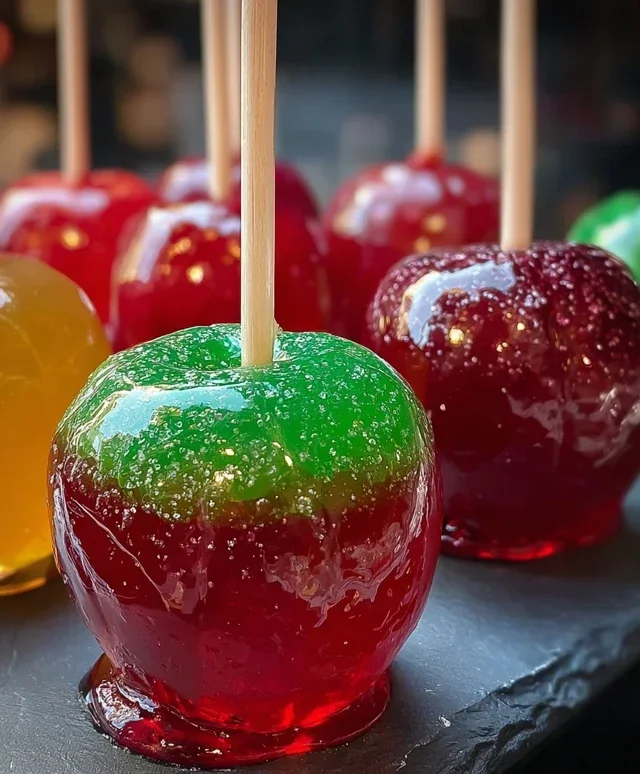
Jolly Rancher Candy Apples are an absolute showstopper, a nostalgic treat that transforms a simple apple into a dazzling explosion of color and flavor. There’s a reason these vibrant confections are a perennial favorite at fairs, festivals, and especially around Halloween. Who can resist that satisfying crunch as you bite through the hard, glassy shell into the crisp, juicy apple beneath? What truly elevates Jolly Rancher Candy Apples beyond the ordinary is the ingenious way the beloved fruity tang of Jolly Rancher candies melts down to create a brilliantly hued and intensely flavored coating. It’s this unique combination of familiar sweetness and playful presentation that makes Jolly Rancher Candy Apples so incredibly special and guaranteed to bring smiles to faces, young and old alike.
Jolly Rancher Candy Apples
Get ready to unleash your inner child with these spectacularly vibrant and unbelievably delicious Jolly Rancher Candy Apples! Forget the boring caramel; we’re diving headfirst into a rainbow of sweet, fruity, and crunchy goodness. These aren’t just treats; they’re edible works of art, perfect for parties, holidays, or just a fun afternoon project. The classic candy apple gets a dazzling makeover, infused with the intense, concentrated fruit flavors of your favorite Jolly Ranchers. The crisp tartness of the apples provides the perfect counterpoint to the intensely sweet, crackly candy shell. Let’s get started on creating these dazzling delights!
Ingredients:
Crafting Your Candy Apple Masterpiece
The journey to perfect Jolly Rancher Candy Apples is a fun and rewarding one. We’ll break it down into simple, manageable steps, ensuring even novice candy makers can achieve professional-looking results. It’s all about patience and precision when working with melted sugar, but the payoff is absolutely worth it!
Preparation is Key
1. First things first, let’s get our apples ready. Wash them thoroughly under cool running water, and then dry them completely with a clean kitchen towel. It’s absolutely crucial that the apples are dry; any moisture will prevent the candy coating from adhering properly, leading to a less-than-ideal crunch. Remove the stems from the apples. Now, carefully insert a wooden skewer or popsicle stick firmly into the stem end of each apple. Push it in about halfway, ensuring it’s securely lodged to act as a handle for dipping. You want it to feel stable so it doesn’t wobble or come loose when you’re dipping your apples into the hot candy mixture.
Melting the Jolly Ranchers
2. Now for the star of the show: the Jolly Ranchers! Open your bags of hard candies and sort them by color if you’re aiming for a specific visual effect, or just dump them all in if you love a surprise explosion of color. Place the candies into a medium-sized, heavy-bottomed saucepan. Add just 1 to 2 tablespoons of water. This small amount of water is essential for helping the candies melt smoothly and evenly. Too much water will result in a thinner syrup that may not harden correctly. Heat the saucepan over medium-low heat. Stir the candies frequently, using a heat-resistant spatula or wooden spoon, until they are completely dissolved and the mixture is smooth and glossy. This process requires patience; avoid the temptation to crank up the heat, as this can scorch the sugar and create a bitter taste. You’re aiming for a beautiful, smooth, liquid candy. The consistency should be like thick syrup.
Coating the Apples
3. Once your Jolly Rancher syrup is perfectly melted and smooth, it’s time for the exciting part – dipping! Carefully remove the saucepan from the heat. Let the mixture cool for just a minute or two. You want it hot enough to coat beautifully, but not so hot that it’s dangerous or that it will cook the apple too quickly. Hold an apple by its skewer and gently tilt the saucepan. Dip the apple into the melted candy, rotating it to ensure an even coating. You want to coat as much of the apple as possible, but don’t feel pressured to cover every single millimeter; a little bit of apple peeking through can add to the rustic charm. As you lift the apple out of the syrup, let any excess candy drip back into the saucepan. This is where you’ll see that beautiful, glossy shell begin extract to form.
Decorating Your Creations
4. Immediately after dipping each apple, it’s time to get creative with your decorations! While the candy coating is still wet and sticky, this is your prime opportunity to add flair. Have your colorful sprinkles and edible glitter ready. You can roll the dipped apples gently in bowls of sprinkles, or carefully sprinkle them over the top. Don’t be shy with the glitter; it adds a magical sparkle that truly elevates these candy apples. For a more sophisticated look, you can also use melted chocolate (milk, dark, or white) in a piping bag with a fine tip and drizzle it over the candy-coated apples. This adds another layer of flavor and visual appeal. Work quickly, as the candy coating will start to harden.
Cooling and Setting
5. Once your apples are beautifully decorated, place them on a baking sheet lined with parchment paper. The parchment paper is essential to prevent sticking. You can also place them upright in a tall glass or mason jar if you have a wider candy surface and want to ensure a perfectly round bottom. Let the candy apples sit at room temperature until the candy coating is completely hardened. This usually takes about 30 minutes to an hour, depending on the humidity and temperature of your kitchen. Resist the urge to refrigerate them, as this can sometimes make the candy coating sticky. Once fully set, your stunning Jolly Rancher Candy Apples are ready to be admired and devoured! Enjoy the vibrant colors and the unforgettable fruity crunch!
Conclusion:
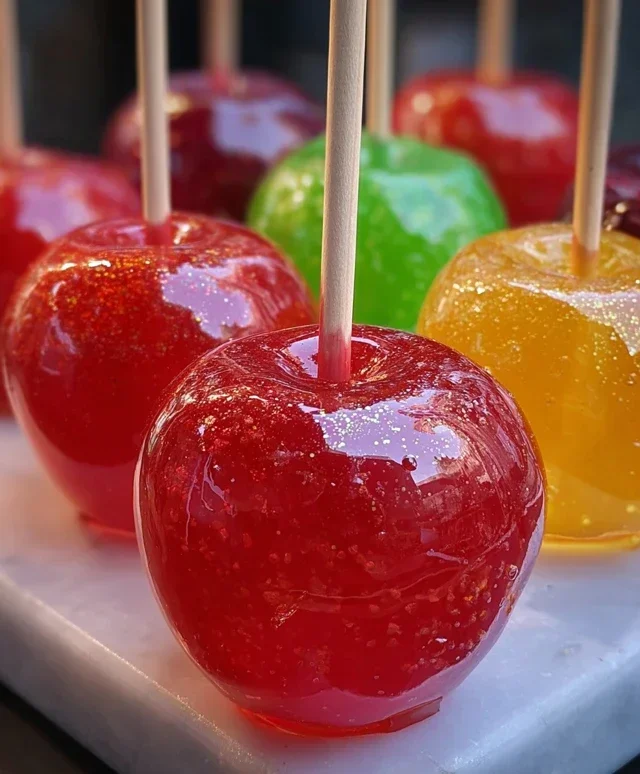
And there you have it – a delightful and surprisingly simple way to bring the vibrant flavors of Jolly Rancher candy into a classic treat! These Jolly Rancher candy apples are not only a feast for the eyes with their stunning colors but also an explosion of sweet and tangy taste that will transport you back to childhood. The crunch of the apple, the smooth, hard candy shell, and the unmistakable fruity punch of Jolly Ranchers make this recipe a guaranteed crowd-pleaser, perfect for parties, holidays, or just a fun afternoon activity. They’re incredibly versatile, offering a wonderful base for your own creative flair.
For serving, these candy apples are best enjoyed at room temperature, sliced or served whole. They make fantastic additions to dessert tables alongside other sweet treats or can be presented as individual gifts. For variations, don’t be afraid to experiment! Try different Jolly Rancher flavors to create unique color and taste combinations. You could even mix in a few chopped nuts or sprinkles into the melted candy before dipping for added texture. I truly encourage you to give this recipe a go; it’s a rewarding and delicious project that’s sure to bring smiles all around.
Frequently Asked Questions:
Why are my Jolly Rancher candy apples sticky instead of hard?
This usually happens if the candy mixture doesn’t reach a high enough temperature. For that perfect hard crack stage, you need to cook the melted Jolly Ranchers to around 300-310°F (150-155°C). Using a candy thermometer is crucial for accurate results. Also, ensure you’re not stirring the candy too much once it starts to melt and caramelize, as this can prevent it from setting properly.
Can I use store-bought caramel as a base before dipping in Jolly Ranchers?
While you can, it will change the texture and flavor profile significantly. The beauty of these Jolly Rancher candy apples lies in the direct candy shell. If you’re looking for a caramel-apple-with-a-Jolly-Rancher-twist, you could dip a pre-caramel-coated apple into the melted Jolly Ranchers, but the straightforward method creates a cleaner, more intense candy apple experience.
How should I store leftover Jolly Rancher candy apples?
It’s best to store them at room temperature, uncovered, or very loosely covered with parchment paper in a cool, dry place. Avoid refrigerating them, as the humidity can make the candy shell sticky and melt. They are best enjoyed within a couple of days of making.
Jolly Rancher Candy Apples
A vibrant and sweet treat, these candy apples feature a crunchy, colorful Jolly Rancher coating that’s a delight for all ages.
Ingredients
-
6 medium apples (Granny Smith, Honeycrisp, or Fuji)
-
2-3 bags Jolly Rancher hard candies (assorted flavors or single color)
-
1-2 tablespoons water
-
Wooden skewers or popsicle sticks
-
Colorful sprinkles
-
Edible glitter
-
Melted white chocolate for drizzling
Instructions
-
Step 1
Wash and thoroughly dry the apples. Remove stems and insert wooden skewers or popsicle sticks firmly into the core of each apple. -
Step 2
Unwrap Jolly Rancher candies and place them in a heatproof bowl. Add 1-2 tablespoons of water. -
Step 3
Melt the Jolly Ranchers. This can be done by microwaving in short intervals (30-60 seconds), stirring in between, until completely melted and smooth. Alternatively, use a double boiler on the stovetop. -
Step 4
Working quickly, carefully dip each apple into the melted Jolly Rancher mixture, tilting to coat evenly. Allow excess candy to drip off. -
Step 5
Immediately sprinkle the coated apples with colorful sprinkles and edible glitter before the candy hardens. -
Step 6
Place the decorated candy apples on parchment paper or a silicone mat to set completely. This may take about 30-60 minutes at room temperature, or faster in the refrigerator. -
Step 7
Once set, drizzle with melted white chocolate for an extra decorative touch.
Important Information
Nutrition Facts (Per Serving)
It is important to consider this information as approximate and not to use it as definitive health advice.
Allergy Information
Please check ingredients for potential allergens and consult a health professional if in doubt.